Raymarching with Fennel and LÖVE
Previously I decided to implement a rather basic raycasting engine in ClojureScript. It was a lot of fun, an interesting experience, and ClojureScript was awesome. I’ve implemented a small labyrinth game and thought about adding more features to the engine, such as camera shake, and wall height change. But when I started working on these, I quickly understood, that I’d like to move on to something more interesting, like a real 3D rendering engine, that also uses rays. <!–more–> Obviously, my first thought was about writing a ray-tracer1. This technique is widely known and gained a lot of traction recently. With native hardware support for ray tracing, a lot of games are using it, and there are a lot of tutorials teaching how to implement one2. In short, we cast a bunch of rays in 3D space, and calculate their trajectories, looking for what ray will hit and bounce off. Different materials have different bounce properties, and by tracing rays from the camera to the source of light, we can imitate illumination. There are also a lot of different approaches how to calculating bouncing, e.g. for global illumination, and ambient light, but I’ve felt that it is a rather complicated task, for a weekend post. And unlike raycasting, most ray-tracers require polygonal information in order to work, whereas raycasting only needs to know wall start and end points.
I’ve wanted a similar approach for 3D rendering, where we specify an object in terms of its mathematical representation. Like for a sphere, we’ll just specify coordinates of a center, and a radius, and our rays will find intersection points with it, providing us sufficient data to draw this sphere on screen. And recently, I’ve read about a similar technique, that uses rays for drawing on the screen, but instead of casting infinite rays as in raycasting, it marches a ray in terms of steps. And it also uses a special trick, to make this process very optimized, therefore we can use it for rendering real 3D objects.
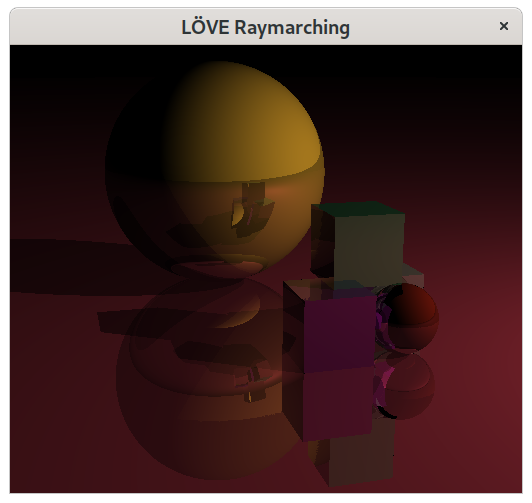
I’ve decided to structure this post similarly to the one about raycasting, so this will be another long-read, often more about Fennel rather than raymarching, but at the end, I promise that we’ll get something that looks like this:
So, just as in raycasting, first we need to do is to understand how the raymarching engine works on paper.
Raymarching basics
Raymarching can be illustrated similarly to raycaster, except it requires more steps until we could render our image. First, we need a camera, and an object to look at:

Our first step would be to cast a ray, however, unlike with raycasting, we’ll cast a portion of a ray:

We then check if the ray intersects with the sphere. It’s not, so we do one more step:

It’s not intersecting yet, so we repeat again:

Oops, the ray overshot and is now inside the sphere. This is not really good option for us, as we want our rays to end directly at the object’s surface, without calculating the intersection point with the object itself. We can fix this by casting a shorter ray:

However, this is very inefficient! And besides, if we’ll change the angle a bit or move the camera, we will overshoot again. This means that we’ll either have an incorrect result or require a very small step size, which will blow up the computation process. How we can fix this?
Distance estimation
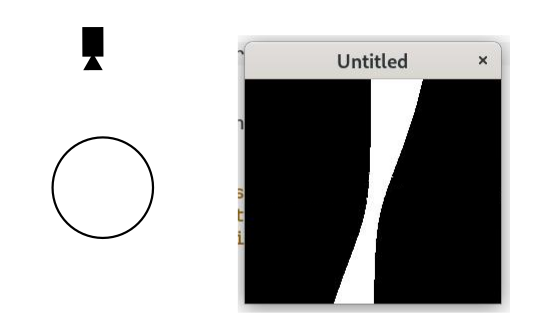
The solution to this is a signed distance function or a so-called Distance Estimator. Imagine if we knew how far we are from the object at any point in time? This would mean that we can shoot a ray of this length in any direction and still don’t hit anything. Let’s add another object to the scene:

Now, let’s draw two circles, which will represent distances from the objects to the point from where we’ll cast rays:

We can see, that there are two circles, and one is bigger than another. This means, that if we choose the shortest safe distance, we can safely cast rays in any direction and not overshoot anything. For example, let’s cast a ray towards the square:

We can see, that we haven’t reached the square, but more importantly, we did not overshoot it. Now we need to march the ray again, but what distance should it cover? To answer this question, we need to take another distance estimation from the ray end to the objects in the scene:

Once again we choose a shorter distance, and march towards the square, then get the distance again, and repeat the whole process:

You can see that with each step the distance to the object becomes smaller, and thus we will never overshoot the object. However, this also means, that we will take a lot of really small steps until we finally fully hit the object if we ever do. This is not a good idea, because it is even more inefficient than using fixed distance, and produces too accurate results, which we don’t really need. So instead of marching up until we exactly hit the object, we will march enough times. E.g., until the distance to the object is small enough, then there’s no real point to continue marching, as it is clear that we will hit the object soon. But this also means, that if the ray goes near the edge of an object, we do a lot of expensive steps of computing distance estimations.
Here’s a ray that is parallel to the side of the square, and marches towards the circle:

We do a lot of seemingly pointless measurements, and if a ray was closer to the square’s side, we would do even more steps. However, this also means, that we can use this data (since we’re already computed it) to render such things as glow, or ambient occlusion. But more on this later.
Once a ray hit an object we have all the data we need. Ray represents a point on the screen, and the more rays we cast the higher resolution of our image will be. And since we’re not using triangles to represent objects, our spheres will always be smooth, no matter how close we are to them, because there are no polygons involved.
This is basically it. Ray marching is a quite simple concept, just like raycaster, although it’s a bit more complicated, as we do have to compute things in 3D space now. So let’s begin implementing it by installing the required tools, and setting up the project.
Project structure
As you know from the title we will use two main tools to create ray-marcher, which are LÖVE, a free game engine, and Fennel the programming language. I’ve chosen Fennel, because it is a Lisp-like language, that compiles to Lua, and I’m quite a fan of Lisps. But we also needed to draw somewhere, and I know no GUI toolkit for Lua. But there is LÖVE - a game engine that runs Lua code, which is capable of running on all systems, thus a perfect candidate for our task.
Installation steps may differ per operating system, so please refer to manuals3, 4. At the time of writing this post, I’m using Fedora GNU/Linux, so for me it means:
$ sudo dnf install love luarocks readline-devel
$ luarocks install --local fennel
$ luarocks install --local readline # requires readline-devel
$ export PATH="$PATH:$HOME/.luarocks/bin"
It’s better to permanently add $HOME/luarocks/bin (or another path, if your installation differs) to the PATH variable in your shell, in order to be able to use installed utilities without specifying the full path every time.
You can test if everything is installed correctly, by running fennel in your command line.
$ fennel
Welcome to Fennel 0.5.0 on Lua 5.3!
Use (doc something) to view documentation.
>> (+ 1 2 3)
6
>>
For other distributions, installation steps may vary, and for Windows, I think it’s safe to skip the readline part, which is fully optional but makes editing in a REPL a bit more comfortable.
Once everything is installed, let’s create the project directory and the main.fnl file, where we will write our code.
$ mkdir love_raymarching
$ cd love_raymarching
$ touch main.fnl
And that’s it!
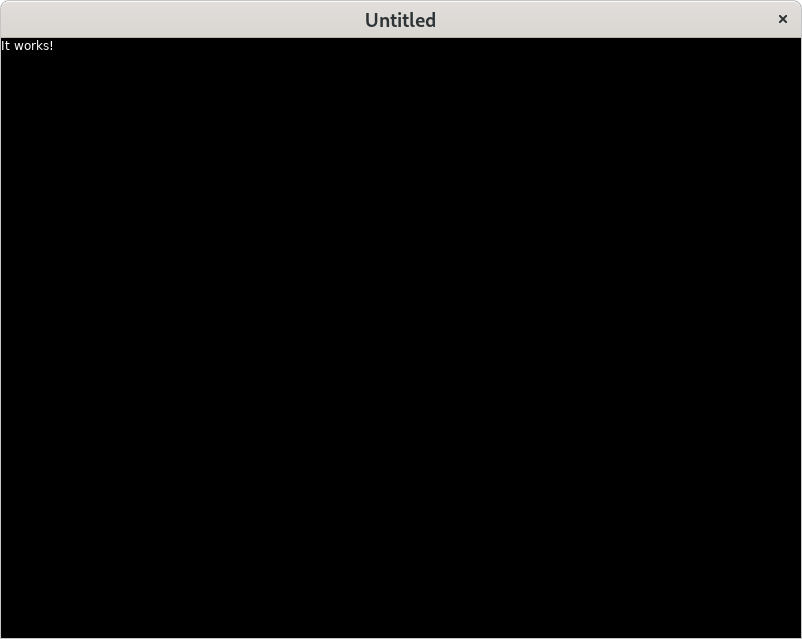
We can test if everything works by adding this code to main.fnl:
(fn love.draw []
  (love.graphics.print "It works!"))
Now we can compile it with fennel --compile main.fnl > main.lua, thus producing the main.lua file, and run love . (dot is intentional, it indicates current directory).
A window should appear, with white text It works! in the upper left corner:
Now we can begin implementing our ray marcher.
Scene setup
Just as in raycaster, we need a camera that will shoot rays, and some objects to look at.
Let’s begin by creating a camera object, that will store coordinates and rotation information.
We can do so, by using var to declare a variable that is local to our file, and that we can later change with set5:
(var camera {:pos [0.0 0.0 0.0]
             :x-rotate 0.0
             :z-rotate 0.0})
For those unfamiliar with Lisps, and especially Clojure, let me quickly explain what this syntax is. If you know this stuff, feel free to skip this part.
We start by using a
varspecial form, that binds a value to a name like this:(var name value). So if we start the REPL, using thefennelcommand in the shell, and write(var a 40), a new variableawill be created. We then can check, that it has the desired value by typinga, and pressing return:>> (var a 40) >> a 40We can then alter the contents of this variable by using
setspecial form, which works like this(set name new-value):>> (set a (+ a 2)) >> a 42Now to curly and square brackets. Everything enclosed in curly braces is a hashmap. We can use any Lua value as our key, and the most common choice is a string, but Fennel has additional syntax for defining keys - a colon followed by a word:
:a. This is called a keyword, and in Fennel, it is essentially the same as"a", but we don’t need to write a pair of quotes. However, keywords can’t contain spaces and some other symbols.So writing this
{:a 0 :b 2 :c :hello}in the REPL will make a new table, that holds three key-value pairs, which we can later get with another syntax - the dot.. Combining it withvar, we can see that it works:>> (var m {:a 1 :b 2 :c :hello}) >> (. m :b) 2There’s also a shorthand for this syntax, that is, we can type
m.band access the:bkey’s value:>> m.b 2 >> m.c "hello"Notice that even though we’ve specified the value for
:cas:hello, the REPL printed it to us as"hello".We’re left with square brackets now, and this is a plain simple vector. It can grow and shrink, and store any Lua values in it:
>> [0 :a "b c" (fn [x] x)]
[0 "a" "b c" #<function: 0x56482230e090>]
However Lua doesn’t really have vectors or arrays, and it utilizes tables for this, where keys are simply indexes. So the code above is equivalent to this Fennel expression
{1 0 2 "a" 3 "b c" 4 (fn [x] x)}, but we can use square brackets for convenience.Note, that we can combine indexed tables (vectors) and ordinary tables (hashmaps) together. We can do it as shown above, by specifying indexes as keys, or defining a vector var and
seta key in it to some value:>> (var v [0 1 :a]) >> (set v.a 3) >> v {:a 3 1 0 2 1 3 "a"}
So camera is essentially a Lua table, that stores keys :pos, :x-rotate, and :y-rotate, each storing a respective value.
We use a vector as our position, and two floats as our rotation angles.
Now we can make objects, but before that, we need a scene to store those objects:
(var scene [])
Yep, that’s our scene. Nothing fancy, simply an empty vector to which we will later add objects.
Now we can create these objects, so let’s start with perhaps the simplest one - a sphere. And I’ll also briefly explain what makes raymarching different from other methods of creating 3D graphics.
Creating objects
What is a sphere? That depends on the domain, we’re working in. Let’s open up Blender, remove the default cube, and create sphere with Shift+a, Mesh, UV Sphere:
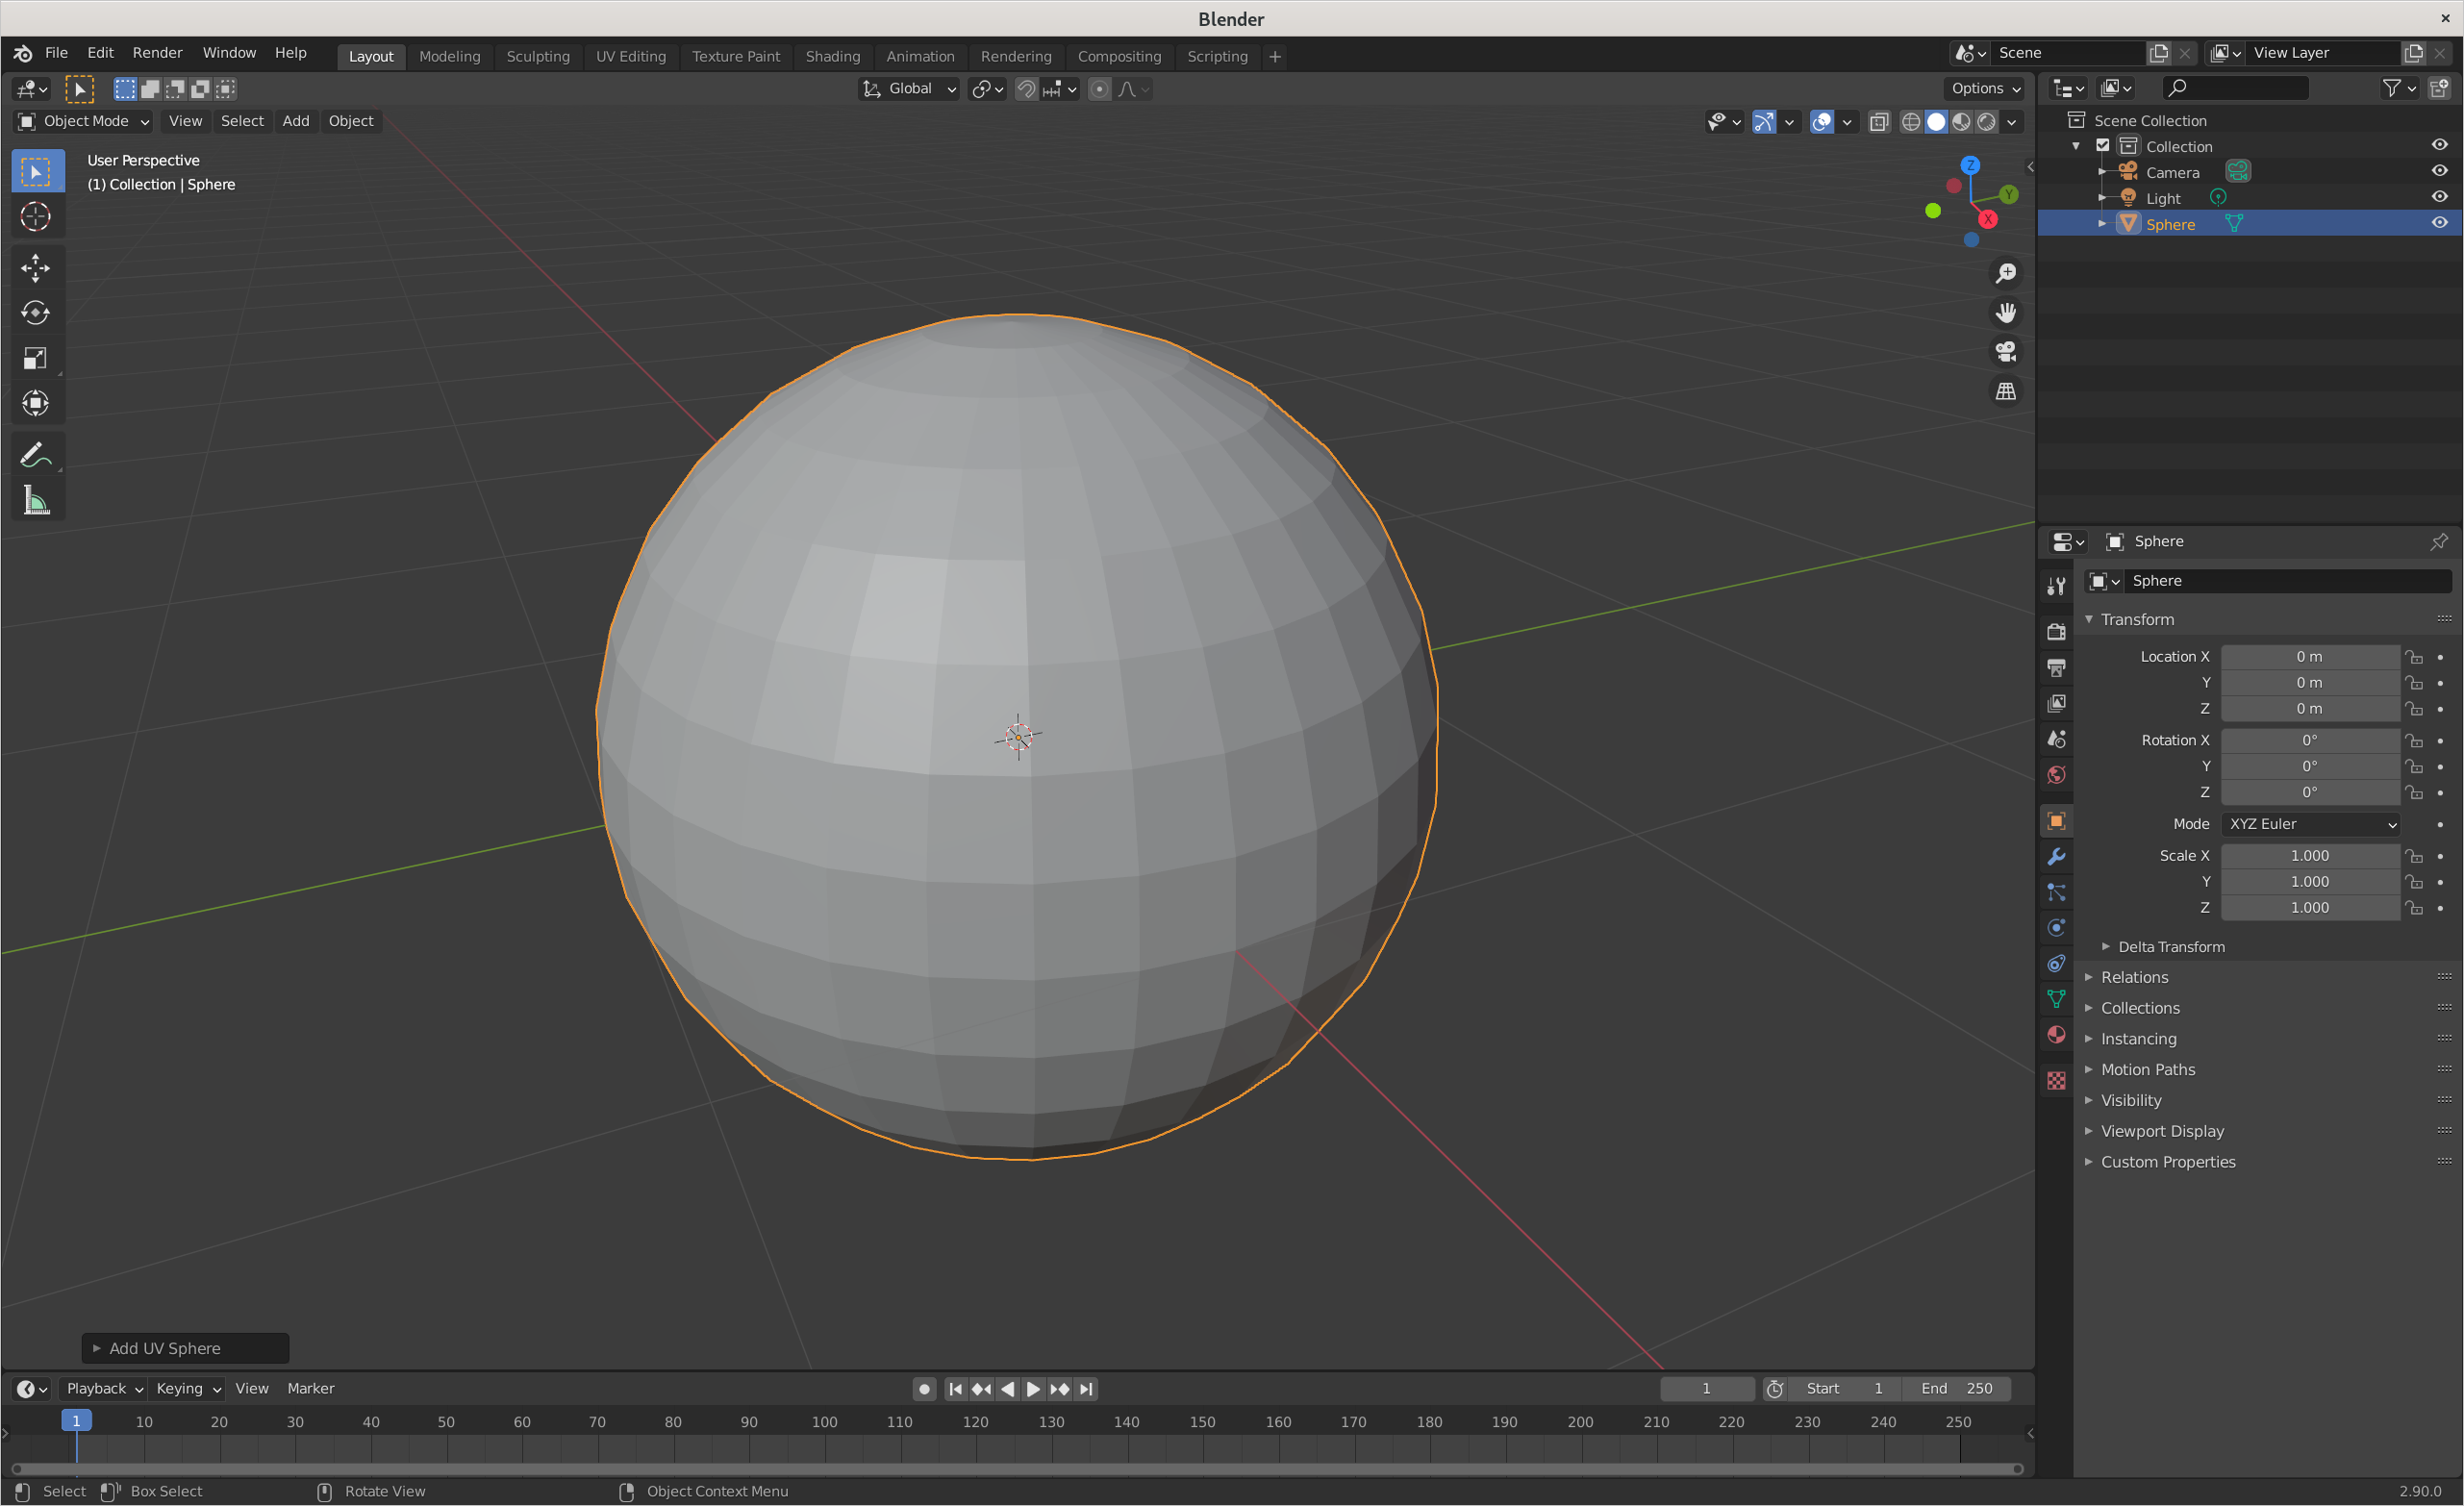
To me, this looks nothing like a sphere, because it consists of rectangles. However, if we subdivide the surface, we can get a more correct representation:
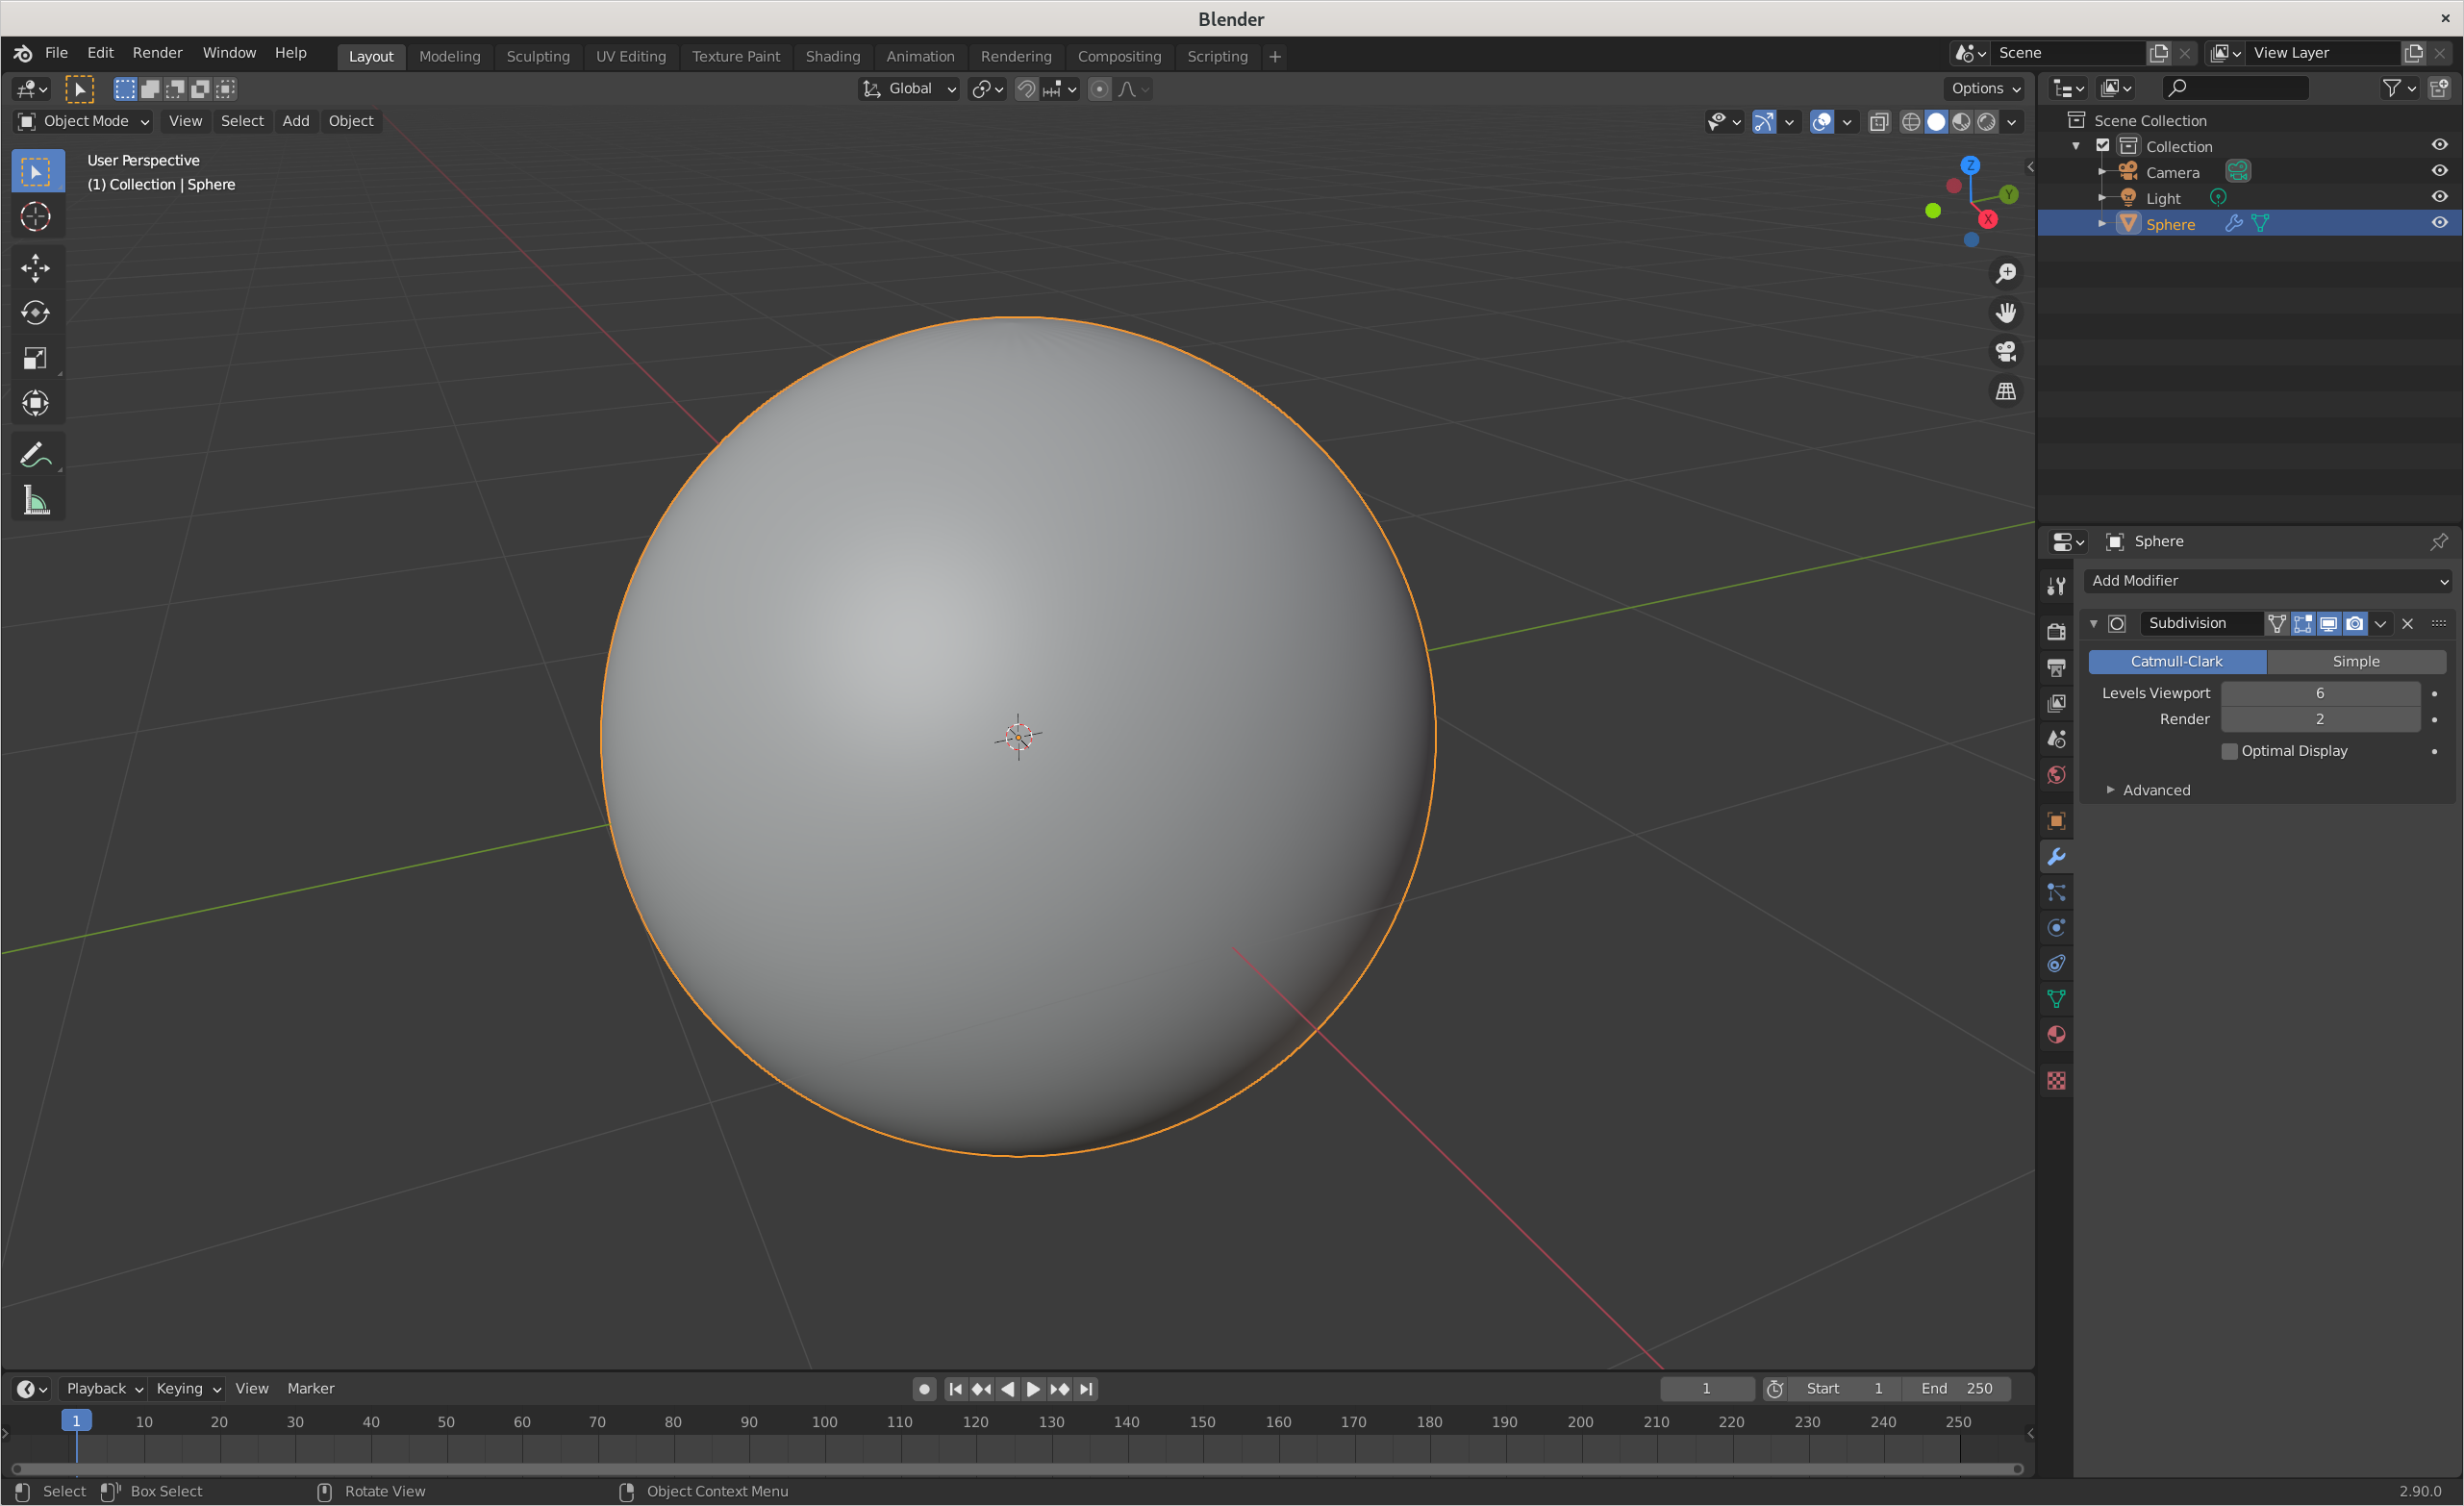
This looks more like a sphere, but this is still just an approximation. Theoretically, if we move very close to it, we will see the edges and corners, especially with flat shading. Also, each subdivision adds more points, and it gets more and more expensive to compute:
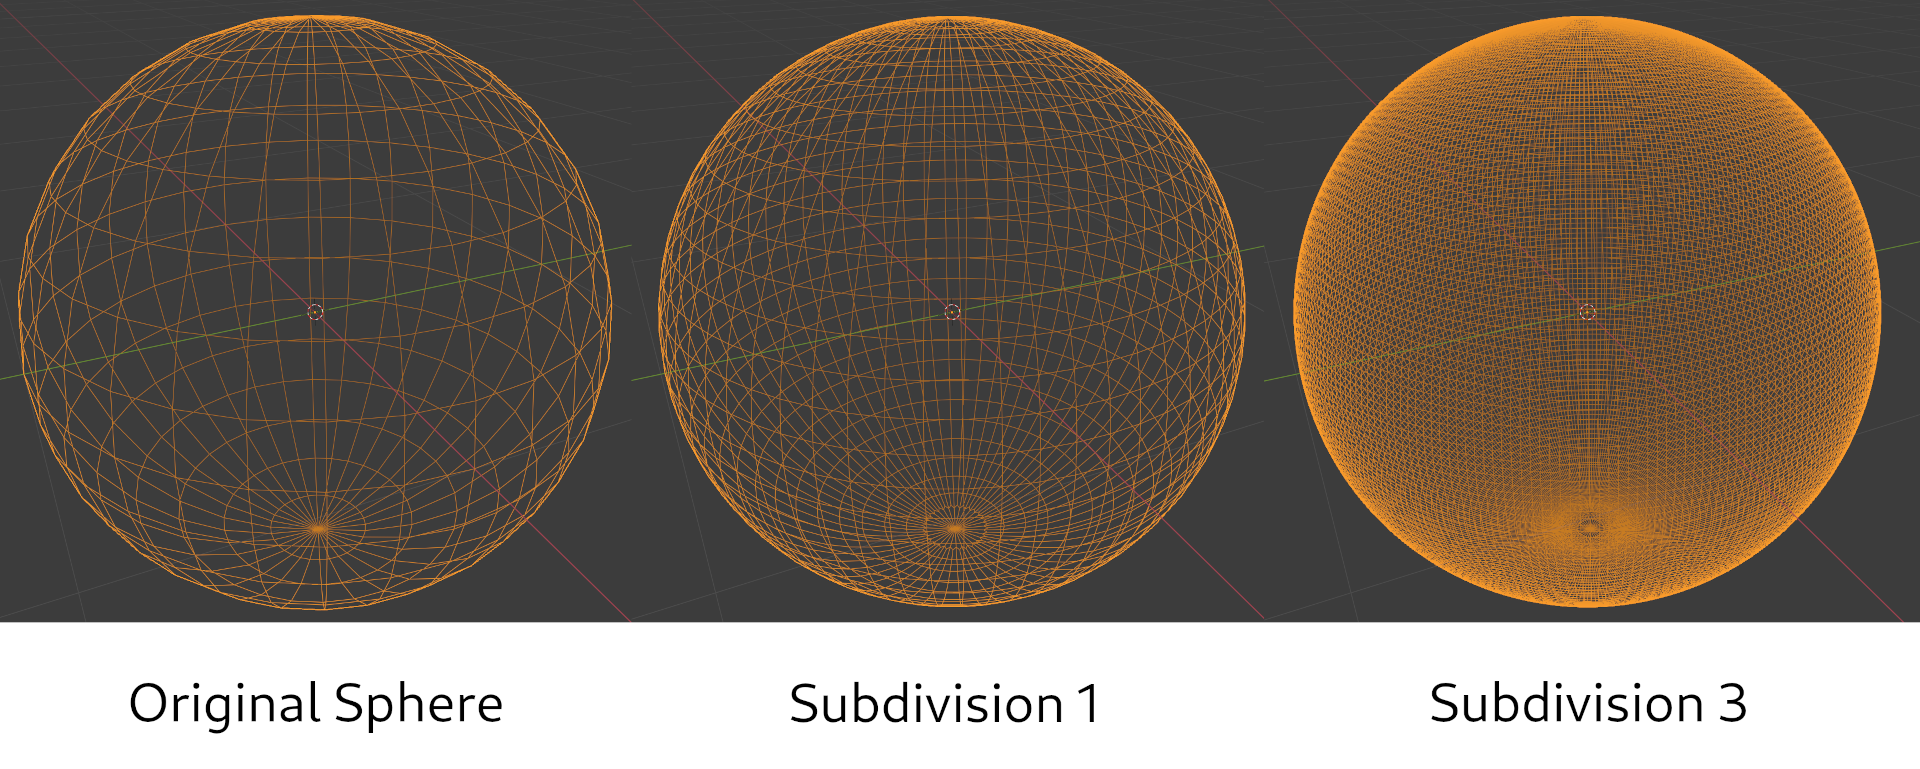
We have to make these trade-offs because we don’t need very accurate spheres when we need real-time processing. But raymarching doesn’t have this limitation, because the sphere in raymarching is defined by the point and radius length. Which we can then work with by using the signed distance function.
So let’s create a function, that will produce a sphere:
(fn sphere [radius pos color] ➊
  (let [[x y z] ➋ (or pos [0 0 0])
        [r g b] (or color [1 1 1])]
    {:radius (or radius 5)
     :pos [(or x 0) (or y 0) (or z 0)]
     :color [(or r 0) (or g 0) (or b 0)]
     :sdf sphere-distance ➌}))
There’s a lot of stuff going on, so let’s dive into it.
This is a so-called constructor - a function, that takes some parameters and constructs an object with these parameters applied, then returns it. In most typed languages we would define a class, or structure to represent this object, however, in Fennel (and hence in Lua) we can just use a table. And this is my favorite part of such languages.
So we used fn special form to create a function named sphere, that takes three parameters: radius, position in space pos, and color ➊.
Then we see another special form let.
It is used to introduce locally scoped variables and has another nice property - destructuring ➋.
Let’s quickly understand how
letworks in this case. If you know how destructuring works, you can skip this part.Here’s a simple example:
>> (let [a 1
         b 2]
     (+ a b))
3
We’ve introduced two local variables
aandb, which hold values1and2respectively. Then we computed their sum and returned it as a result.This is good, but what if we wanted to compute a sum of three vector elements multiplied by
b? Let’s put a vector intoa:>> (let [a [1 2 3] b 2] <???>)There are many ways to do this, such as
reduceover a vector with a function that sums elements, or getting values from the vector in a loop and putting those into some local variable. However, in the case of our project, we always know exactly how many elements there will be, so we can just take these out by indexes without any kind of loop:>> (let [a [1 2 3] b 2 a1 (. a 1) a2 (. a 2) a3 (. a 3)] (* (+ a1 a2 a3) b)) 12Yet, this is very verbose, and not really good. We can make it a bit less verbose by skipping local variable definitions and using values directly in the sum:
>> (let [a [1 2 3]
         b 2]
     (print (.. "value of the second element is " (. a 2)))
     (* (+ (. a 1) (. a 2) (. a 3)) b))
value of the second element is 2
12
However, again, this isn’t really great, as we have to repeat the same syntax three times, and what if we want to use the second value from the vector in several places? Like here, I’ve added
That’s where destructuring comes in handy, and trust me, it is a very handy thing. We can specify a pattern, that is applied to our data, and binds variables for us like this:
>> (let [[a1 a2 a3] [1 2 3]
         b 2]
     (print (.. "value of the second element is " a2))
     (* (+ a1 a2 a3) b))
value of the second element is 2
12
This works somewhat like this:
[1  2  3]
 ↓  ↓  ↓
[a1 a2 a3]
This is much shorter than any of the previous examples and allows us to use any vector values in several places.
We can also destructure maps like this:
>> (var m {:a-key 1 :b-key 2})
>> (let [{:a-key a
          :b-key b} m]
     (+ a b))
3
And this also has a shorthand for when the name of the key and the name of desired local binding will match:
>> (var m {:a 1 :b 2})
>> (let [{: a : b} m]
     (+ a b))
3
Which is even shorter.
All this essentially boils down to this kind of Lua code:
-- vector destructuring
-- (let [[a b] [1 2]] (+ a b))
local _0_ = {1, 2}
local a = _0_[1]
local b = _0_[2]
return (a + b)

-- hashmap destructuring
-- (let [{: a : b} {:a 1 :b 2}] (+ a b))
local _0_ = {a = 1, b = 2}
local a = _0_["a"]
local b = _0_["b"]
return (a + b)
This is nothing special really, but this example still shows the power of Lisp’s macro system, in which destructuring is implemented. But it gets really cool when we use this in function forms, as we will see later.
If we were to call (sphere) now, we would get an error, because we specified a value ➌ for a key :sdf, that doesn’t yet exist.
SDF stands for Signed Distance Function.
That is a function, that will return the distance from a given point to an object.
The distance is positive when the point is outside of the object and negative when the point is inside the object.
Let’s define an SDF for a sphere. What’s great about spheres, is that to compute the distance to the sphere’s surface, we only need to compute the distance to the center of the sphere, and subtract the sphere’s radius from this distance.
![\[d(P,S)=\sqrt{(S_x-P_x)^2+(S_y-P_y)^2+(S_z-P_z)^2}-S_r\]](https://andreyor.st/ltximg/2020-10-15-raymarching-with-fennel-and-love_9184447246721f1ac8fa15ea8fc4c62e5817d1d9.svg)
Let’s implement this:
(local sqrt math.sqrt) ➊

(fn sphere-distance [{:pos [sx sy sz] : radius} [x y z]] ➋
  (- (sqrt (+ (^ (- sx x) 2) (^ (- sy y) 2) (^ (- sz z) 2)))
     radius))
For performance reasons we declare math.sqrt as a local variable sqrt, that holds function value, to avoid repeated table lookup.
As was later pointed out, Luajit does optimize such calls, and there is no repeated lookup for method calls. This is still true for plain Lua, so I’m going to keep this as is, but you can skip all these local definitions if you want and use methods directly.
And at ➋ we again see destructuring, however not in the let block, but in the function argument list.
What essentially happens here is this - function takes two parameters, the first of which is a hashmap, which must have a :pos keyword associated with a vector of three numbers, and a :radius keyword with a value.
The second parameter is simply a vector of three numbers.
We immediately destructured these parameters into a set of variables local to the function body.
Hashmap is being destructured into sphere position vector, which is immediately destructured to sx, sy, and sz, and a radius variable storing sphere’s radius.
Second parameter is destructured to x, y, and z.
We then compute the resulting value by using the formula above.
However, Fennel and Lua only understand definitions in the order from the top to the bottom, so we need to define sphere-distance before sphere.
Let’s test our function by passing several points and a sphere of radius 5:
>> (sphere-distance (sphere 5) [5 0 0])
0.0
>> (sphere-distance (sphere 5) [0 15 0])
10.0
>> (sphere-distance (sphere 5) [0 0 0])
-5.0
Great!
First, we check if we’re on the sphere’s surface, because the radius of our sphere is 5, and we’ve set x coordinate to 5 as well.
Next, we check if we’re 10 something away from the sphere, and lastly, we check that we’re inside the sphere because the sphere’s center and our point both are at the origin.
But we also can call this function as a method with : syntax:
>> (local s (sphere))
>> (s:sdf [0 0 0])
-5
This works because methods in Lua are syntactic sugar.
When we write (s:sdf p) it is essentially equal to (s.sdf s p), and our distance function takes sphere as its first parameter, which allows us to utilize method syntax.
Now we need a distance estimator - a function that will compute distances to all objects and will return the shortest one, so we could then safely extend our ray by this amount.
(local DRAW-DISTANCE 1000)

(fn distance-estimator [point scene]
  (var min DRAW-DISTANCE)
  (var color [0 0 0])
  (each [_ object (ipairs scene)]
    (let [distance (object:sdf point)]
      (when (< distance min)
        (set min distance)
        (set color (. object :color)))))
  (values min color))
This function will compute the distance to each object in the scene from given point, using our signed distance functions, and will choose the minimum distance and the color of this ray.
Even though it makes little sense to return color from the distance-estimator, we’re doing this here because we don’t want to compute this whole process again just to get the color of the endpoint.
Let’s check if this function works:
>> (distance-estimator [5 4 0] [(sphere) (sphere 2 [5 7 0] [0 1 0])])
1.0     [0 1 0]
It works, we obtained the distance to the second sphere, and its color because the point we specified was closer to this sphere than to the other.
With the camera, object, a scene, and this function we have all we need to start shooting rays and rendering this on screen.
Marching ray
Just as in raycaster, we cast rays from the camera, but now we do it in 3D space. In raycasting, our horizontal resolution was specified by a number of rays, and our vertical resolution was basically infinite. For 3D this is not an option, so our resolution now depends on the 2D matrix of rays, instead of the 1D matrix.
Quick math. How many rays we’ll need to cast in order to fill up 512 by 448 pixels? The answer is simple - multiply width and height and here’s the amount of rays you’ll need:
>> (* 512 448)
229376
A stunning 229376 rays to march.
And each ray has to do many distance estimations as it marches away from the point.
Suddenly, all that micro-optimizations, like locals for functions do not feel that unnecessary.
Let’s hope for the best and that LÖVE will handle real-time rendering.
We can begin by creating a function that marches a single ray in the direction our camera looks.
But first, we need to define what we would use to specify coordinates, directions, and so on in our 3D space.
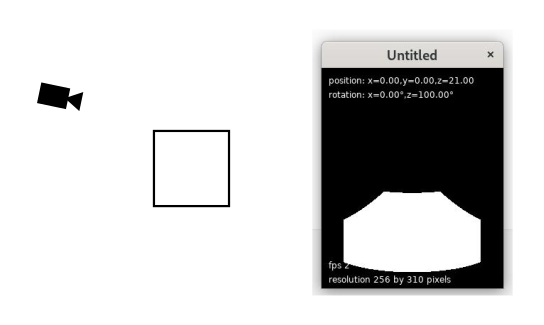
My first attempt was to use spherical coordinates to define ray direction and move points in 3D space relative to the camera. However, it had a lot of problems, especially when looking at objects at angles different from 90 degrees. Like here’s a screenshot of me looking at the sphere from the “front”:

And here’s when looking from “above”:
And when I added the cube object, I noticed a slight fish-eye distortion effect:
Which was not great at all. So I’ve decided that I would remake everything with vectors, and make a proper camera, with a “look-at” point, will compute projection plane, and so on.
And to do this we need to be able to work with vectors - add those, multiply, normalize, e.t.c. I’ve wanted to refresh my knowledge on this topic, and decided not to use any existing library for vectors, and implement everything from scratch. It’s not that hard. Especially when we already have vectors in the language, and can destructure it to variables with ease.
So we need these basic functions:
vec3- a constructor with some handy semantics,vec-length- function that computes magnitude of vector,- arithmetic functions, such as
vec-sub,vec-add, andvec-mul, - and other unit vector functions, mainly
normalize,dot-product, andcross-product.
Here’s the source code of each of these functions:
(fn vec3 [x y z]
  (if (not x) [0 0 0]
      (and (not y) (not z)) [x x x]
      [x y (or z 0)]))

(fn vec-length [[x y z]]
  (sqrt (+ (^ x 2) (^ y 2) (^ z 2))))

(fn vec-sub [[x0 y0 z0] [x1 y1 z1]]
  [(- x0 x1) (- y0 y1) (- z0 z1)])

(fn vec-add [[x0 y0 z0] [x1 y1 z1]]
  [(+ x0 x1) (+ y0 y1) (+ z0 z1)])

(fn vec-mul [[x0 y0 z0] [x1 y1 z1]]
  [(* x0 x1) (* y0 y1) (* z0 z1)])

(fn norm [v]
  (let [len (vec-length v)
        [x y z] v]
    [(/ x len) (/ y len) (/ z len)]))

(fn dot [[x0 y0 z0] [x1 y1 z1]]
  (+ (* x0 x1) (* y0 y1) (* z0 z1)))

(fn cross [[x0 y0 z0] [x1 y1 z1]]
  [(- (* y0 z1) (* z0 y1))
   (- (* z0 x1) (* x0 z1))
   (- (* x0 y1) (* y0 x1))])
Since we already know how destructuring works, it’s not hard to see what these functions do.
vec3, however, has some logic in it, and you can notice that if has three outcomes.
if in Fennel is more like cond in other lisps, which means that we can specify as many else if as we want.
Therefore, calling it without arguments produces a zero-length vector [0 0 0].
If called with one argument, it returns a vector where each coordinate is set to this argument: (vec 3) will produce [3 3 3].
In other cases we either specified or not specified z, so we can simply create a vector with x, y, and either 0 or z.
You may wonder, why this is defined as functions, and why I didn’t implement operator overloading, so we could simply use + or * to compute values?
I’ve tried this, however, this is extremely slow, since on each operation we have to do a lookup in meta-table, and this is like really slow.
Here’s a quick benchmark:
(macro time [body]
  `(let [clock# os.clock
         start# (clock#)
         res# ,body
         end# (clock#)]
     (print (.. "Elapsed " (* 1000 (- end# start#)) " ms"))
     res#))

;; operator overloading
(var vector {})
(set vector.__index vector)

(fn vec3-meta [x y z]
  (setmetatable [x y z] vector))

(fn vector.__add [[x1 y1 z1] [x2 y2 z2]]
  (vec3-meta (+ x1 x2) (+ y1 y2) (+ z1 z2)))

(local v0 (vec3-meta 1 1 1))
(time (for [i 0 1000000] (+ v0 v0 v0 v0)))

;; basic functions
(fn vec3 [x y z]
  [x y z])

(fn vector-add [[x1 y1 z1] [x2 y2 z2]]
  (vec3 (+ x1 x2) (+ y1 y2) (+ z1 z2)))

(local v1 (vec3 1 1 1))
(time (for [i 0 1000000] (vector-add (vector-add (vector-add v1 v1) v1) v1)))
If we run it with lua interpreter, we’ll see the difference:
$ fennel --compile test.fnl | lua
Elapsed 1667.58 ms
Elapsed 1316.078 ms
Testing this with luajit claims that this way is actually faster, however, I’ve experienced a major slowdown in the renderer - everything ran about 70% slower, according to the frame per second count.
So functions are okay, even though are much more verbose.
Now we can define a march-ray function:
(fn move-point [point dir distance] ➊
  (vec-add point (vec-mul dir (vec3 distance))))

(local MARCH-DELTA 0.0001)
(local MAX-STEPS 500)

(fn march-ray [origin direction scene]
  (var steps 0)
  (var distance 0)
  (var color nil)

  (var not-done? true) ➋
  (while not-done?
    (let [➍ (new-distance
              new-color) (-> origin
                             (move-point direction distance)
                             (distance-estimator scene))]
      (when (or (< new-distance MARCH-DELTA)
                (>= distance DRAW-DISTANCE)
                (> steps MAX-STEPS) ➌)
        (set not-done? false))
      (set distance (+ distance new-distance))
      (set color new-color)
      (set steps (+ steps 1))))
  (values distance color steps))
Not much, but we have some things to discuss.
First, we define a function to move points in 3D space ➊.
It accepts a point, which is a three-dimensional vector, a direction vector dir, which must be normalized, and a distance.
We then multiply the direction vector by a vector that consists of our distances and add it to the point.
Simple and easy.
Next, we define several constants, and the march-ray function itself.
It Defines some local vars, that hold initial values, and uses a while loop to march a given ray enough times.
You can notice, that at ➋ we created a not-done? var, that holds true value, and then use it in the while loop as our test.
And you also can notice that at ➌ we have a test, in case of which we set not-done? to false and exit the loop.
So you may wonder, why not use for loop instead?
Lua supports index-based for loops.
Fennel also has support for these.
So why use while with a variable?
Because Fennel has no break special form for some reason.
Here’s a little rant. You can skip it if you’re not interested in me making unconfirmed inferences about Fennel :).
I think that Fennel doesn’t support
breakbecause Fennel is influenced by Clojure (correct me if I’m wrong), and Clojure doesn’t havebreakeither. However, looping in Clojure is a bit more controllable, as we choose when we want to go to the next iteration:(loop [i 0] ;; do stuff (when (< i 10) (recur (+ i 1))))Which means that
wheniis less then10I want you to perform another iteration.In Fennel, however, the concept isn’t quite like this, because we have to define a
varexplicitly, and put it into thewhiletest position:(var i 0) (while (< i 10) ;; do stuff (set i (+ i 1)))You may not see the difference, but I do. This also can be trivially expressed as a
forloop:(for [i 0 10] (do-stuff)). However, not every construct can be defined asforloop, when we don’t havebreak. And in Clojure we don’t have to declare a variable outside the loop, sinceloopdoes it for us, but the biggest difference is here:(loop [i 0] (when (or (< i 100) (< (some-foo) 1000)) (recur (inc i))))Notice, that we’re looping until
ireaches100, or untilsome-fooreturns something greater than 1000. We can easily express this asforloop in Lua:for i = 0, 100 do if some_foo() > 1000 then break end endHowever, we can’t do the same in Fennel, because there’s no
break. In this case we could defineivar, putsome_foo() < 1000to thewhileloop test, and then use break whenireaches100, like this:(var i 0) (while (or (< i 100) (< (some-foo) 1000)) (set i (+ i 1)))This is almost like the Clojure example, and you may wonder why I complain, but in the case of
march-rayfunction, we can’t do this either! Because the function we call returns multiple values, we need to destructure ➍ to be able to test those. Or in some loops, such a function may depend on the context of the loop, so it has to be inside the loop, not in the test.So not having
break, or the ability to control when to go to the next iteration is a serious disadvantage. Yes, Clojure’srecuris also limited, since it must be in the tail position, so you can’t use it ascontinueor something like that. But it’s still a bit more powerful construct. I’ve actually thought about writing aloopmacro, but it seems that it’s not as easy to do in Fennel, as in Clojure, because Fennel lacks some inbuilt functions to manipulate sequences. I mean it’s totally doable, but requires way too much work compared to defining a Booleanvarand setting it in the loop.
At ➍ we see the syntax that I didn’t cover before: (let [(a b) (foo)] ...).
Many of us, who are familiar with Lisp and especially Racket may be confused.
You see, in Racket, and other Scheme implementations (that allow using different kinds of parentheses) let has this kind of syntax:
(let [(a 1)   ;; In Scheme square brackets around bindings
      (b 41)] ;; are replaced with parentheses
  (+ a b))
Or more generally, (let ((name1 value1) (name2 value2) ...) body).
However, in the case of the march-ray function, we see a similar form, except the second element has no value specified.
This is again a valid syntax in some lisps (Common Lisp, for example), as we can make a binding that holds nothing and later set it, but this is not what happens in this code, as we don’t use foo at all:
(let [(a b) (foo)]
  (+ a b))
And, since in Fennel we don’t need parentheses, and simply specify bindings as a vector [name1 value1 name2 value2 ...], another possible confusion may happen.
You may think that (a b) is a function call that returns a name, and (foo) is a function call that produces a value.
But then we somehow use a and b.
What is happening here?
But this is just another kind of destructuring available in Fennel.
Lua has 1 universal data type, called a table. However Lua doesn’t have any special syntax for destructuring, so when a function needs to return several values, you have two options. First, you can return a table:
function returns_table(a, b)
   return {a, b}
end
But the user of such function will have to get values out of the table themselves:
local res = returns_table(1, 2)
local a, b = unpack(res) -- or use indexes, e.g. local a = res[1]
print("a: " .. a .. ", b: " .. b)
-- a: 1, b: 2
But this is extra work, and it ties values together into a data structure, which may not be really good for you. So Lua has a shorthand for this - you can return multiple values:
function returns_values(a, b)
   return a, b
end

local a, b = returns_values(1, 2)
print("a: " .. a .. ", b: " .. b)
-- a: 1, b: 2
This is shorter and more concise.
Fennel also support this multivalue return with values special form:
(fn returns-values [a b]
  (values a b))
This is equivalent to the previous code, but how do we use these values? All binding forms in Fennel support destructuring, so we can write this as:
(local (a b) (returns-values 1 2))
(print (.. "a: " a ", b: " b))
;; a: 1, b: 2
Same can be done with vectors or maps when defining, local, var, or global variables:
(local [a b c] (returns-vector)) ;; returns [1 2 3]
(var {:x x :y y :z z} (returns-map)) ;; returns {:x 1 :y 2 :z 3}
(global (bar baz) (returns-values)) ;; returns (values 1 2)
And all of this works in let or when defining a function!
OK. We’ve defined a function that marches a ray, now we need to shoot some!
Shooting rays
As with math functions, let’s define some local definitions somewhere at the top of the file:
(local love-points love.graphics.points)
(local love-dimensions love.graphics.getDimensions)
(local love-set-color love.graphics.setColor)
(local love-key-pressed? love.keyboard.isDown)
(local love-get-joysticks love.joystick.getJoysticks)
This is pretty much all we’ll need from LÖVE - two functions to draw colored pixels, one function to get the resolution of the window, and input handling functions for the keyboard and gamepad.
We’ll also define some functions in love namespace table (IDK how it is called properly in Lua, because it is a table that acts like a namespace) - love.load, love.draw, and others along the way.
Let’s begin by initializing our window:
(local window-width 512)
(local window-height 448)
(local window-flags {:resizable true :vsync false :minwidth 256 :minheight 224})

(fn love.load []
  (love.window.setTitle "LÖVE Raymarching")
  (love.window.setMode window-width window-height window-flags))
This will set our window’s default width and height to 512 by 448 pixels and set the minimum width and height to 256 by 224 pixels respectively.
We also add title "LÖVE Raymarching" to our window, but it is fully optional.
Now we can set love.draw function, which will shoot 1 ray per pixel, and draw that pixel with the appropriate color.
However, we need a way of saying in which direction we want to shoot our ray.
To define the direction we will first need a projection plane and a look-at point.
Let’s create a look-at point as a simple zero vector [0 0 0] for now:
(local lookat [0 0 0])
Now we need to understand how we define our projection plane. In our case, a projection plane is a plane that is our screen, and our camera is some distance away from the screen. We also want to be able to change our field of view, or FOV for short, so we need a way of computing the distance to projection, since the closer we are to the projection plane, the wider our field of view:

We can easily compute the distance if we have an angle, which we also can define as a var:
(var fov 60)
Now we can compute our projection distance (PD), by using this formula:
![\[PD=\frac{1}{\tan{(fov/2)}}\]](https://andreyor.st/ltximg/2020-10-15-raymarching-with-fennel-and-love_32b13e61133b5f79cc4ee40a35afa13e72a8e735.svg)
Where fov is in Radians.
And to compute radians we’ll need this constant:
(local RAD (/ math.pi 180.0))
Now we can transform any angle into radians by multiplying it by this value.
At this point, we know what is the distance to our projection plane, but we don’t know its size and position.
First, we need a ray origin (RO), and we already have it as our camera, so our ro will be equal to the current value of camera.pos.
Next, we need a look-at point, and we have it as a lookat variable, which is set to [0 0 0].
Now we can define a direction vector, that will specify our forward direction:
![\[\overrightarrow{F}=normalize(\overrightarrow{lookat}-\overrightarrow{ro})\]](https://andreyor.st/ltximg/2020-10-15-raymarching-with-fennel-and-love_ff94fdb25712c79044bfb62102c21558e710b0cc.svg)
And with this vector F if we move our point the distance that we’ve computed previously, we’ll navigate the center of our projection plane, which we can call C:
![\[\overrightarrow{C}=\overrightarrow{RO}+\overrightarrow{F}\cdot{PD}\]](https://andreyor.st/ltximg/2020-10-15-raymarching-with-fennel-and-love_c12545f0f21b7028183e58e928fa64ce358535e6.svg)
The last thing we need to know, in order to get our orientation in space, is where is up and right.
We can compute this by specifying an upward vector and taking a cross product of it and our forward vector, thus producing a vector that is perpendicular to both of these vectors, and pointing to the right.
To do this we need an up vector, which we define like this [0 0 -1].
You may wonder why it is defined with the z-axis negative, but this is done so positive z values actually go up as we look from the camera, and the right is to the right.
We then compute the right vector as follows:
![\[\overrightarrow{R}=normalize(cross(\overrightarrow{F},\begin{bmatrix}0&0&-1\end{bmatrix}))\]](https://andreyor.st/ltximg/2020-10-15-raymarching-with-fennel-and-love_bb975b5a9462d9d4d29cb464c294a9c493a095d2.svg)
And the up vector U is a cross product of R and F. Let’s write this down as in love.draw:
(fn love.draw []
  (let [(width height) (love-dimensions)
        projection-distance (/ 1 (tan (* (/ fov 2) RAD)))
        ro camera.pos
        f (norm (vec-sub lookat ro))
        c (vec-add ro (vec-mul f (vec3 projection-distance)))
        r (norm (cross [0 0 -1] f))
        u (cross f r)]
    nil)) ;; TBD
Currently, we only compute these values but do not use those, hence the nil at the end of the let.
But now, as we know where our projection plane is, and where our right and up are, we can compute the intersection point, where at given x and y coordinates of a plane in unit vector coordinates, thus defining a direction vector.
So, for each x from 0 to width and each y from 0 to height we will compute a uv-x and uv-y coordinates, and find the direction vector rd.
To find the uv-x we need to make sure it is between -1 and 1 by dividing current x by width and subtracting 0.5 from it, then multiplying by x/width.
For uv-y we only need to divide current y by height, and subtract 0.5:
(for [y 0 height]
  (for [x 0 width]
    (let [uv-x (* (- (/ x width) 0.5) (/ width height))
          uv-y (- (/ y height) 0.5)]
      nil))) ;; TBD
Now as we have uv-x and uv-y, we can compute intersection point i, by using the up and right vectors and the center of the plane:
![\[\overrightarrow{I}=\overrightarrow{C}\cdot(\overrightarrow{R}\cdot{X_{UV}}+\overrightarrow{U}\cdot{Y_{UV}})\]](https://andreyor.st/ltximg/2020-10-15-raymarching-with-fennel-and-love_a69b83ebed3bcf5eca644e7d65e9b0d62504bb41.svg)
And finally, compute our direction vector RD:
![\[\overrightarrow{RD}=normalize(\overrightarrow{I}-\overrightarrow{RO})\]](https://andreyor.st/ltximg/2020-10-15-raymarching-with-fennel-and-love_e500d651acc2ee6f01323734028400ea32660648.svg)
And now we can use our march-ray procedure to compute the distance and color of the pixel.
Let’s wrap everything up:
(local tan math.tan)
(fn love.draw []
  (let [projection-distance (/ 1 (tan (* (/ fov 2) RAD)))
        ro camera.pos
        f (norm (vec-sub lookat ro))
        c (vec-add ro (vec-mul f (vec3 projection-distance)))
        r (norm (cross [0 0 -1] f))
        u (cross f r)
        (width height) (love-dimensions)]
    (for [y 0 height]
      (for [x 0 width]
        (let [uv-x (* (- (/ x width) 0.5) (/ width height))
              uv-y (- (/ y height) 0.5)
              i (vec-add c (vec-add
                            (vec-mul r (vec3 uv-x))
                            (vec-mul u (vec3 uv-y))))
              rd (norm (vec-sub i ro))
              (distance color) (march-ray ro rd scene)]
          (if (< distance DRAW-DISTANCE)
              (love-set-color color)
              (love-set-color 0 0 0))
          (love-points x y))))))
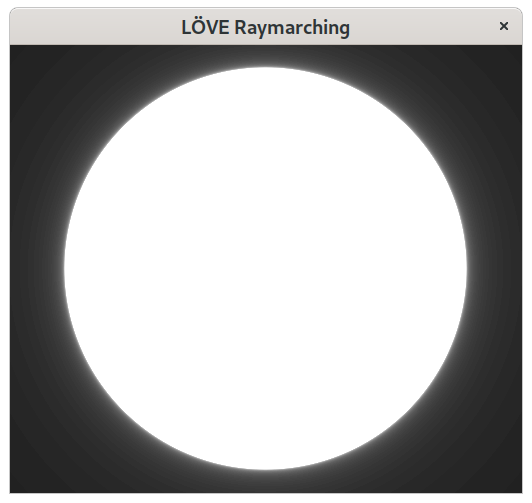
Now, if we set the scene to contain a default sphere, and place our camera at [20 0 0], we should see this:
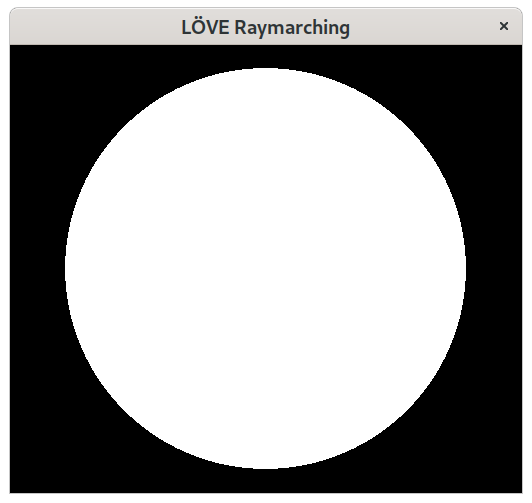
This is correct because our default sphere has white as the default color.
You can notice, that we compute distance and color by calling (march-ray ro rd scene), and then check if distance is less than DRAW-DISTANCE.
If this is the case, we set the pixel’s color to the color found by march-ray function, otherwise, we set it to black.
Lastly, we draw the pixel to the screen and repeat the whole process for the next intersection point, thus the next pixel.
But we don’t have to draw black pixels if we didn’t hit anything!
Remember, that in the beginning, I’ve written, that if we go past the object, we do many steps, and we can use this data to render glow.
So if we modify love.draw function a bit, we will be able to see the glow around our sphere.
And the closer the gay got to the sphere, the stronger the glow will be:
;; rest of love.draw
(let [ ;; rest of love.draw
      (distance color steps) (march-ray ro rd scene)]
  (if (< distance DRAW-DISTANCE)
    (love-set-color color)
    (love-set-color (vec3 (/ steps 100))))
  (love-points x y))
;; rest of love.draw
Here, I’m setting the color to the number of steps divided by 100, which results in this glow effect:
Similarly to this glow effect, we can create a fake ambient occlusion - the more steps we did before hitting the surface, the more complex it is, hence less ambient light should be able to pass. Unfortunately, the only object we have at this moment is a sphere, so there’s no way of showing this trick on it, as its surface isn’t very complex.
All this may seem expensive, and it actually is. Unfortunately, Lua doesn’t have real multithreading to speed this up, and the threads feature, provided by LÖVE results in even worse performance than computing everything in a single thread. Well, at least the way I’ve tried it. There’s a shader DSL in LÖVE, which could be used to compute this stuff on GPU, but this is currently out of the scope of this project, as I wanted to implement this in Fennel.
Speaking of shaders, now, that we can draw pixels on the screen, we also can shade those, and compute lighting and reflections!
Lighting and reflections
Before we begin implementing lighting, let’s add two more objects - a ground plane, and an arbitrary box. Much like a sphere object, we first define the signed distance function, and then the constructor for the object:
(local abs math.abs)

(fn box-distance [{:pos [box-x box-y box-z]
                   :dimensions [x-side y-side z-side]}
                  [x y z]]
  (sqrt (+ (^ (max 0 (- (abs (- box-x x)) (/ x-side 2))) 2)
           (^ (max 0 (- (abs (- box-y y)) (/ y-side 2))) 2)
           (^ (max 0 (- (abs (- box-z z)) (/ z-side 2))) 2))))

(fn box [sides pos color]
  (let [[x y z] (or pos [0 0 0])
        [x-side y-side z-side] (or sides [10 10 10])
        [r g b] (or color [1 1 1])]
    {:dimensions [(or x-side 10)
                  (or y-side 10)
                  (or z-side 10)]
     :pos [(or x 0) (or y 0) (or z 0)]
     :color [(or r 0) (or g 0) (or b 0)]
     :sdf box-distance}))

(fn ground-plane [z color]
  (let [[r g b] (or color [1 1 1])]
    {:z (or z 0)
     :color [(or r 0) (or g 0) (or b 0)]
     :sdf (fn [plane [_ _ z]] (- z plane.z))}))
In case of ground-plane we incorporate :sdf as a anonymous function, because it is a simple one-liner.
Now, as we have more objects, let’s add those to the scene and see if those work:
(var camera {:pos [20.0 50.0 0.0]
             :x-rotate 0.0
             :z-rotate 0.0})

(local scene [(sphere nil [-6 0 0] [1 0 0])
              (box nil [6 0 0] [0 1 0])
              (ground-plane -10 [0 0 1])])
With this scene and camera we should see this:
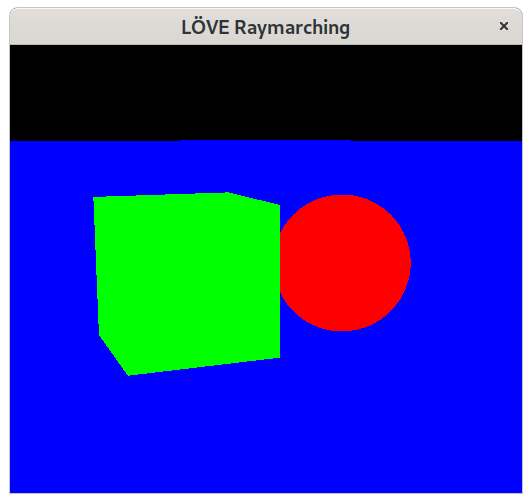
It’s a bit sadistic in the eyes, but we can at least be sure that everything works correctly. Now we can implement lighting.
In order to calculate lighting, we’ll need to know a normal to the surface at the point.
Let’s create get-normal function, that receives the point, and our scene:
(fn get-normal [[px py pz] scene]
  (let [x MARCH-DELTA
        (d) (distance-estimator [px py pz] scene)
        (dx) (distance-estimator [(- px x) py pz] scene)
        (dy) (distance-estimator [px (- py x) pz] scene)
        (dz) (distance-estimator [px py (- pz x)] scene)]
    (norm [(- d dx) (- d dy) (- d dz)])))
It is a nice trick, since we create three more points around our original point, use the existing distance estimation function, and get a normalized vector of subtraction of each axis from the original point, with the distance to the new point. Let’s use this function to get normal for each point, and use the normal as our color:
;; rest of love.draw
(if (< distance DRAW-DISTANCE)
    (love-set-color (get-normal (move-point ro rd distance) scene))
    (love-set-color 0 0 0))
;; rest of love.draw
Notice that in order to get endpoint of our ray we move-point ro along the direction rd using the computed distance.
We then pass the resulting point into get-normal, and our scene, thus computing the normal vector, which we then pass to love-set-color, and it gives us this result:
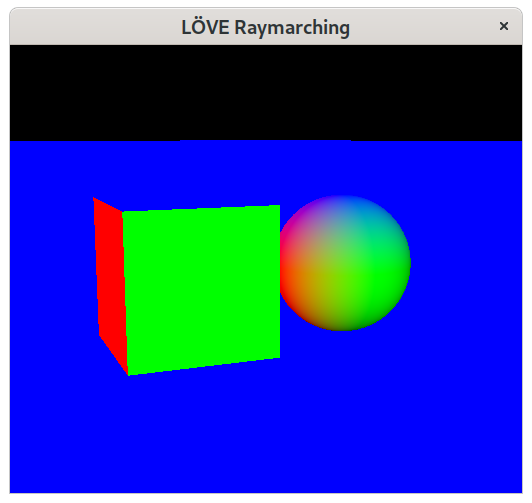
You can see that the ground-plane remained blue, and this isn’t an error.
Blue in our case is [0 0 1], and since in our world, positive z coordinates indicate up, we can see it directly in the resulting color of the plane.
The top of the cube and the sphere are also blue, and the front side is green, which means that our normals are correct.
Now we can compute basic lighting. For that we’ll need a light object:
(var light [70 40 100])
Let’s create a shade-point function, that will accept a point, point color, light position, and a scene:
(fn shade-point [point color light scene]
  (vec-mul color (vec3 (point-lightness point scene light))))
It may seem that this function’s only purpose is to call point-lightness, which we will define a bit later, and return a new color.
And this is true, at least for now.
Let’s create point-lightness function:
(fn clamp [a l t]
  (if (< a l) l
      (> a t) t
      a))

(fn above-surface-point [point normal]
  (vec-add point (vec-mul normal (vec3 (* MARCH-DELTA 2)))))

(fn point-lightness [point scene light]
  (let [normal (get-normal point scene) ➊
        light-vec (norm (vec-sub light point))
        (distance) (march-ray (above-surface-point point normal) ➋
                              light-vec
                              scene)
        lightness (clamp (dot light-vec normal) 0 1)] ➌
    (if (< distance DRAW-DISTANCE)
        (* lightness 0.5)
        lightness)))
What this function does, is simple.
We compute the normal ➊ for given point, then we find a point that is just above the surface, using above-surface-point function ➋.
And we use this point as our new ray origin to march towards the light.
We then get the distance from the march-ray function and check if we’ve gone all the way to the max distance or not.
If not, this means that there was a hit, and we divide total lightness by 2 thus creating a shadow.
In the other case, we return lightness as is.
And lightness is a dot product between light-vec and normal to the surface ➌, where light-vec is a normalized vector from the point to the light.
If we again modify our love.draw function like this:
;; rest of love.draw
(if (< distance DRAW-DISTANCE)
    (let [point (move-point ro rd distance)]
      (love-set-color (shade-point point color scene light)))
    (love-set-color 0 0 0))
;; rest of love.draw
We should see the shadows:
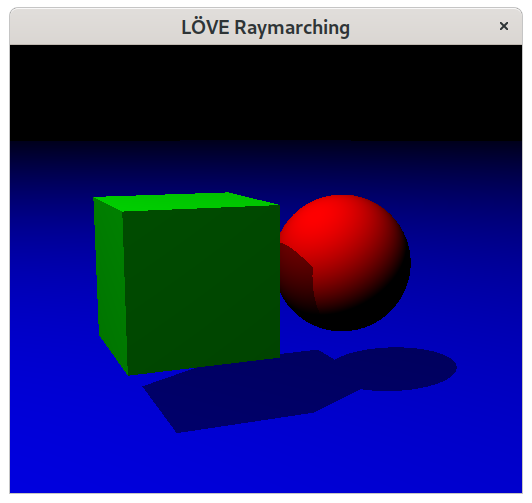
This already looks like real 3D, and it is. But we can do a bit more, so let’s add reflections.
Let’s create a reflection-color function:
(var reflection-count 3)

(fn reflection-color [color point direction scene light]
  (var [color p d i n] [color point direction 0 (get-normal point scene)]) ➊
  (var not-done? true)
  (while (and (< i reflection-count) not-done?)
    (let [r (vec-sub d (vec-mul (vec-mul (vec3 (dot d n)) n) [2 2 2])) ➋
          (distance new-color) (march-ray (above-surface-point p n) r scene)] ➌
      (if (< distance DRAW-DISTANCE)
          (do (set p (move-point p r distance))
              (set n (get-normal p scene))
              (set d r) ➍
              (let [[r0 g0 b0] color
                    [r1 g1 b1] new-color
                    l (/ (point-lightness p scene light) 2)]
                (set color [(* (+ r0 (* r1 l)) 0.66)
                            (* (+ g0 (* g1 l)) 0.66)
                            (* (+ b0 (* b1 l)) 0.66)]) ➎))
          (set not-done? false) ➏))
    (set i (+ i 1)) ➐)
  color)
This is quite a big function, so let’s look at it piece by piece.
First, we use destructuring to define several vars ➊, which we will be able to change using set later in the function.
Next, we go into the while loop, which checks both for maximum reflections reached, and if the ray went to infinity.
The first thing we do in the loop, computes the reflection vector r ➋, by using this formula:
![\[\overrightarrow{R}=\overrightarrow{D}-\overrightarrow{N}\cdot{dotproduct}(\overrightarrow{D},\overrightarrow{N})\cdot{2}\]](https://andreyor.st/ltximg/2020-10-15-raymarching-with-fennel-and-love_dc97ecd084b47c4884333ad30190962c2093b2a7.svg)
This is our new direction, which we will march from new above-surface-point ➌.
If we’ve hit something, and our distance will be less than DRAW-DISTANCE, we’ll set our point p to new point, compute new normal n, and set direction d to previous direction, which was reflection vector r ➍.
Next, we compute the resulting color.
I’m doing a simple color addition here, which is not an entirely correct way of doing it, but for now, I’m fine with that.
We also compute lightness of the reflection point, and divide it by 2, so our reflections appear slightly darker.
Then we add each channel and make sure it is not greater than 1, by multiplying it by 0.66 ➎.
The trick here is that maximum lightness we can get is 0.5, so if we add two values, one of which is multiplied by 0.5 overall result can be averaged by multiplying by 0.66.
This way we do not lose brightness all the way and the reflection color blends with the original color nicely.
In case we don’t hit anything, it means that this is the final reflection, therefore we can end ➏ the while loop on this iteration.
Lastly, since I’ve already ranted on the absence of break in Fennel, we have to increase the loop counter manually ➐ at the end of the loop.
Let’s change shade-point so it will pass color into this function:
(fn shade-point [point color direction scene light]
  (-> color
      (vec-mul (vec3 (point-lightness point scene light)))
      (reflection-color point direction scene light)))
You can notice that I’ve added the direction parameter, as we need it for computing reflections, so we also have to change the call to shade-point in love.draw function:
;; rest of love.draw
(if (< distance DRAW-DISTANCE)
    (let [point (move-point ro rd distance)]
      (love-set-color (shade-point point color rd scene light))) ;; rd is our initial direction
    (love-set-color 0 0 0))
;; rest of love.draw
Let’s try this out (I’ve brought ground-plane a bit closer to objects so we could better see reflections):

We can see reflections, and reflections of reflections in reflections, because previously we’ve set reflection-count to 3.
Currently, our reflections are pure mirrors, as we reflect everything at a perfect angle, and shapes appear just as real objects.
This can be changed by introducing materials, that have different qualities like roughness, and by using better reflection algorithms like Phong shading, but maybe next time.
Refractions also kinda need materials, as refraction angles can be different, depending on what kind of material it goes through.
E.g. glass and still pool of water should have different refraction angles.
And some surfaces should reflect rays at certain angles, and let them go through at other angles, which will also require certain modifications in the reflection algorithm.
Now, if we would set our camera, lookat, and light to:
(local lookat [19.75 49 19.74])

(var camera {:pos [20 50 20]
             :x-rotate 0
             :z-rotate 0})

(local scene [(box [5 5 5] [-2.7 -2 2.5] [0.79 0.69 0.59])
              (box [5 5 5] [2.7 2 2.5] [0.75 0.08 0.66])
              (box [5 5 5] [0 0 7.5] [0.33 0.73 0.42])
              (sphere 2.5 [-2.7 2.5 2.5] [0.56 0.11 0.05])
              (sphere 10 [6 -20 10] [0.97 0.71 0.17])
              (ground-plane 0 [0.97 0.27 0.35])])
We would see an image from the beginning of this post:
For now, I’m pretty happy with the current result, so lastly let’s make it possible to move into our 3D space.
User input
We’ll be doing two different ways of moving in our scene - with keyboard and gamepad. The difference mostly is in the fact, that gamepads can give us floating point values, so we can move slower or faster depending on how we move the analogs.
We’ve already specified needed functions from LÖVE as our locals, but to recap, we’ll need only two:
(local love-key-pressed? love.keyboard.isDown)
(local love-get-joysticks love.joystick.getJoysticks)
But first, we’ll need to make changes to our camera, as currently, it can only look at the origin.
How will we compute the look-at point for our camera so we will be able to move it around in a meaningful way?
I’ve decided that a good way will be to “move” the camera forward a certain amount, and then rotate this point around the camera by using some angles.
Luckily for us, we’ve already specified that our camera has two angles :x-rotate, and z-rotate:
(var camera {:pos [20 50 20]
             :x-rotate 255
             :z-rotate 15})
And it is also declared as a var, which means that we can set new values into it.
Let’s write a function that will compute a new lookat point for current camera position and rotation:
(local cos math.cos)
(local sin math.sin)

(fn rotate-point [[x y z] [ax ay az] x-angle z-angle]
  (let [x (- x ax)
        y (- y ay)
        z (- z az)
        x-angle (* x-angle RAD)
        z-angle (* z-angle RAD)
        cos-x (cos x-angle)
        sin-x (sin x-angle)
        cos-z (cos z-angle)
        sin-z (sin z-angle)]
    [(+ (* cos-x cos-z x) (* (- sin-x) y) (* cos-x sin-z z) ax)
     (+ (* sin-x cos-z x) (* cos-x y) (- (* sin-x sin-z z)) ay)
     (+ (* (- sin-z) x) (* cos-z z) az)]))

(fn forward-vec [camera]
  (let [pos camera.pos]
    (rotate-point (vec-add pos [1 0 0]) pos camera.x-rotate camera.z-rotate)))
The first function rotate-point will rotate one point around another point by using two degrees.
It is based on aircraft principal axes, but we only have two axes, so we do not need to “roll”, hence we do little fewer computations here.
Next is the forward-vec function, that computes current “forward” vector for camera.
Forward, in this case, means the direction camera is “facing”, which is based on two angles we specify in the camera.
With this function we can implement basic movement and rotation functions for the camera:
(fn camera-forward [n]
  (let [dir (norm (vec-sub (forward-vec camera) camera.pos))]
    (set camera.pos (move-point camera.pos dir n))))

(fn camera-elevate [n]
  (set camera.pos (vec-add camera.pos [0 0 n])))

(fn camera-rotate-x [x]
  (set camera.x-rotate (% (- camera.x-rotate x) 360)))

(fn camera-rotate-z [z]
  (set camera.z-rotate (clamp (+ camera.z-rotate z) -89.9 89.9)))

(fn camera-strafe [x]
  (let [z-rotate camera.z-rotate]
    (set camera.z-rotate 0)
    (camera-rotate-x 90)
    (camera-forward x)
    (camera-rotate-x -90)
    (set camera.z-rotate z-rotate)))
And if we modify our love.draw again, we’ll be able to use our computed look-at point as follows:
(fn love.draw []
  (let [;; rest of love.draw
        lookat (forward-vec camera)
        ;; rest of love.draw
Now we don’t need a global lookat variable, and it is actually enough for us to compute new lookat every frame.
As for movement, let’s implement a simple keyboard handler:
(fn handle-keyboard-input []
  (if (love-key-pressed? "w") (camera-forward 1)
      (love-key-pressed? "s") (camera-forward -1))
  (if (love-key-pressed? "d")
      (if (love-key-pressed? "lshift")
          (camera-strafe 1)
          (camera-rotate-x 1))
      (love-key-pressed? "a")
      (if (love-key-pressed? "lshift")
          (camera-strafe -1)
          (camera-rotate-x -1)))
  (if (love-key-pressed? "q") (camera-rotate-z 1)
      (love-key-pressed? "e") (camera-rotate-z -1))
  (if (love-key-pressed? "r") (camera-elevate 1)
      (love-key-pressed? "f") (camera-elevate -1)))
Similarly, we can implement controller support:
(fn handle-controller []
  (when gamepad
    (let [lstick-x  (gamepad:getGamepadAxis "leftx")
          lstick-y  (gamepad:getGamepadAxis "lefty")
          l2        (gamepad:getGamepadAxis "triggerleft")
          rstick-x  (gamepad:getGamepadAxis "rightx")
          rstick-y  (gamepad:getGamepadAxis "righty")
          r2        (gamepad:getGamepadAxis "triggerright")]
      (when (and lstick-y (or (< lstick-y -0.2) (> lstick-y 0.2)))
        (camera-forward (* 2 (- lstick-y))))
      (when (and lstick-x (or (< lstick-x -0.2) (> lstick-x 0.2)))
        (camera-strafe (* 2 lstick-x)))
      (when (and rstick-x (or (< rstick-x -0.2) (> rstick-x 0.2)))
        (camera-rotate-x (* 4 rstick-x)))
      (when (and rstick-y (or (< rstick-y -0.2) (> rstick-y 0.2)))
        (camera-rotate-z (* 4 rstick-y)))
      (when (and r2 (> r2 -0.8))
        (camera-elevate (+ 1 r2)))
      (when (and l2 (> l2 -0.8))
        (camera-elevate (- (+ 1 l2)))))))
Only for a controller, we make sure that our l2 and r2 axes are from 0 to 2, since by default these axes are from -1 to 1, which isn’t going to work for us.
Similarly to this, we can add the ability to change the field of view or reflection count, but I’ll leave this out for those who are interested in trying it themselves.
It’s not hard.
As a final piece, we need to detect if the controller was inserted and handle keys somewhere. So let’s add these two final functions that we need for everything to work:
(var gamepad nil)

(fn love.joystickadded [g]
  (set gamepad g))

(fn love.update [dt]
  (handle-keyboard-input)
  (handle-controller))
love.joystickadded will take care of watching for new controllers, and love.update will ask for new input every now and then.
By this moment we should have a working raymarching 3D renderer with basic lighting and reflections!
Final thoughts
I’ve decided to write this post because I was interested in three topics:
- Fennel, a Lisp-like language, which is a lot like Clojure syntax-wise, and has great interop with Lua (because it IS Lua)
- LÖVE, is a nice game engine I’ve been watching for a long time already and played some games written with it, which were quite awesome,
- and Lua itself, a nice, fast scripting language, with the cool idea that everything is a table.
Although I didn’t use much of Lua here, I’ve actually tinkered with it a lot during the whole process, testing different things, reading Fennel’s compiler output, and benchmarking various constructs, like field access, or unpacking numeric tables versus multiple return values.
Lua has some really cool semantics of defining modules as tables and incorporating special meaning to tables via setmetatable, which is really easy to understand in my opinion.
Fennel is a great choice if you don’t want to learn Lua syntax (which is small, but, you know, it exists).
For me, Fennel is a great language, because I don’t have to deal with Lua syntax AND because I can write macros.
And even though I didn’t write any macro for this project, because everything is already presented in Fennel itself, the possibility of doing this is worth something.
Also, during benchmarking various features, I’ve used self-written time macro:
(macro time [body]
  `(let [clock# os.clock
         start# (clock#)
         res# ,body
         end# (clock#)]
     (print (.. "Elapsed: " (* 1000 (- end# start#)) " ms"))
     res#))
So the ability to define such things is a good thing.
LÖVE is a great engine, and although I’ve used a very little bit of it, I still think that this is a really cool project, because there is so much more in it. Maybe someday I’ll make a game that will realize LÖVE’s full potential.
On a downside note… The resulting raymarching is very slow. I’ve managed to get around 25 FPS for a single object in the scene, and a 256 by 224 pixel resolution. Yes, this is because it runs in a single thread, and does a lot of expensive computations. Lua itself isn’t a very fast language, and even though LÖVE uses Luajit - a just-in-time compiler that emits machine code, it’s still not fast enough for certain operations, or techniques. For example, if we implement operator overloading for vectors we’ll lose a lot of performance for constant table lookups. This is an existing problem in Lua, since it does its best of being small and embeddable, so it could work nearly on anything, therefore it doesn’t do a lot of caching and optimizations.
But hey, this is a raymarching in ~350 lines of code with some cool tricks like destructuring! I’m fine with the results. A slightly more polished version of the code from this article is available at this repository, so if anything doesn’t work in the code above, or you got lost and just want to play with the final result, you know where to go :)
Till next time, and thanks for reading!
-
there’s no need to declare a variable as
varif it is a table and we’re only going to change the values stored inside the table, not the table itself. ↩︎