Slopes in AABB collision systems
Recently (again, bored on a vacation), I started working on a game I’ve planned for a long time. I wasn’t satisfied with my existing implementations of a player controller1, so I started working on a new one. After a bit of fiddling around, I came to something I’m satisfied with, for now, at least, but while working on it, I wanted to add something I haven’t done in any of my projects yet - I decided to add slopes to my game.
I’m no game developer, to be honest, it’s not even my hobby, although I enjoy the process to some extent. Game development offers immediate visual and interactive feedback, unlike many other areas in programming, and I like that. So, while working on this player controller and figuring out how to implement slopes, I’ve searched the web to see if someone already did something similar in a system I’m working with, but I didn’t manage to find anything. Maybe I simply wasn’t specific enough in my search requests, or didn’t search deep enough, and there’s actually a guide on how to do that somewhere on the web, I decided to write this post anyway.
AABB collisions
First, let’s discuss what AABB actually means.
For those unfamiliar with collision detection, there are many ways of checking if two objects collide. A lot of them, actually, each with its pros and cons. Some give very accurate collisions for objects of any shape, but are not real-time viable, others are real-time, but far less accurate. It’s an ongoing research, and new ways of detecting complex collisions as fast as possible appear every now and then.
I’m mainly developing games in either TIC-80 or LÖVE2D. LÖVE2D actually comes with a collision detection library, called Box2D. My games are sprite-based, and since I often use TIC-80, I can’t really commit to Box2D, so instead I opt for a simpler collision detection logic.
That’s where AABB comes - it’s an Axis-Sligned Bounding Box collision detection system:
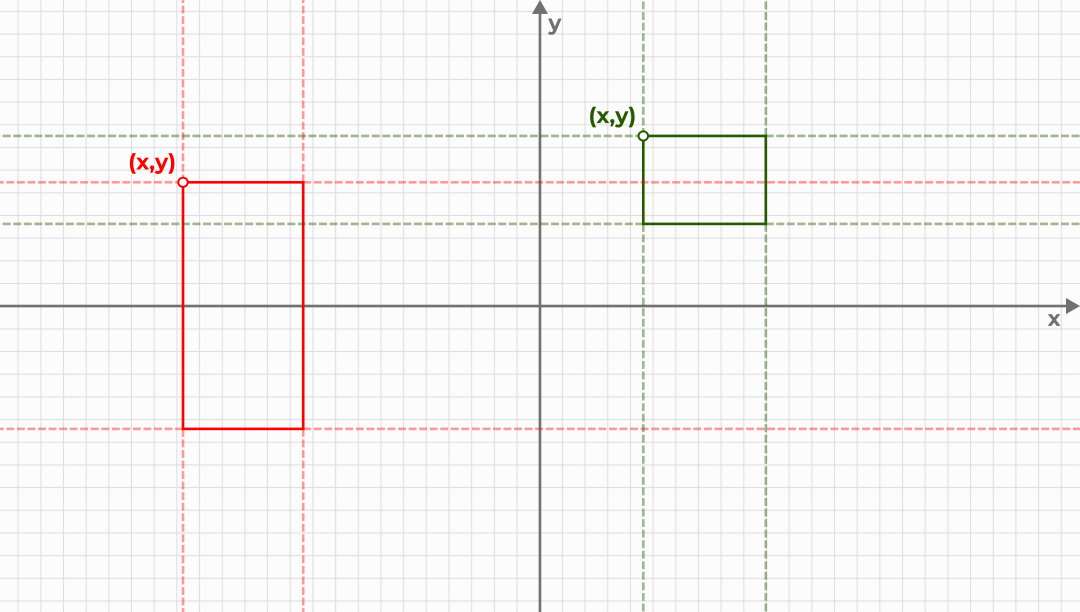
Figure 1: Axis-aligned rectangles are quite easy to check for intersections, since all we need to know is their origin and dimensions.
The general idea is that if the bounding box of object A is completely to the left or to the right of object B, the objects don’t collide. Similarly, if the object A is above or below object B, there’s no collision either. And when all four of these situations are not true, then there’s a collision.
It’s a rather simple solution, but it can yield satisfying results. Implementing this by hand is trivial, but there’s a lot more to checking collisions - we need to make it quite optimized, and handle object interactions.
Thankfully, there’s an amazing pure Lua library called bump.lua, that implements these AABB checks and more. And it’s near perfect for sprite-based games, since everything is aligned to the grid, so that’s what I’m using in TIC-80 and Love2D. Perfect, until we want something other than a rectangle. For example, slopes.
Implementing slopes with bump.lua
To be honest, there’s not that much to it for implementing slopes in an AABB collision system.
Actually, I could just give you the formula and be done with it.
Even more, actually - I’m sure you can figure it out if you think about it for just a bit.
But that’s not fun!
So instead, I’ll walk you through from the beginning - creating a TIC project, adding bump.lua, loading entities to the world, adding collisions, simple physics, and finally, slopes.
But, if you want, you can skip directly to the slope implementation section, no worries!
TIC-80
TIC-80 is a small game engine that supports Lua as one of its main languages to develop games, along with other ones, like Fennel. I primarily do my projects in Fennel, as I like it a little bit more than Lua2, but for this post, I chose Lua, as I want this to be a more general tutorial, applicable to a wider audience.
Even though TIC-80 is a fantasy computer, I believe it is capable of being an engine that you can use to make full-fledged games with. Two years ago, Balatro again proved that Love2D is fully suited for making massively successful games, without the need for something more, like Godot or Unity. I think TIC-80 can shine similarly, but it seems that far fewer people consider it as a viable alternative, even fewer than with Love2D.
The other thing I often think about is that games don’t have to be implemented with the best technology to be good games. I’ve played a few games on Game Boy Color and especially Game Boy Advance, and they were amazing even today. And these consoles were quite limited even for the time. Yet, people are still making games for them.
And that’s another reason why I want to write this post more as a tutorial on TIC-80, as it can maybe make you want to try it!
So let’s start by firing up TIC-80:
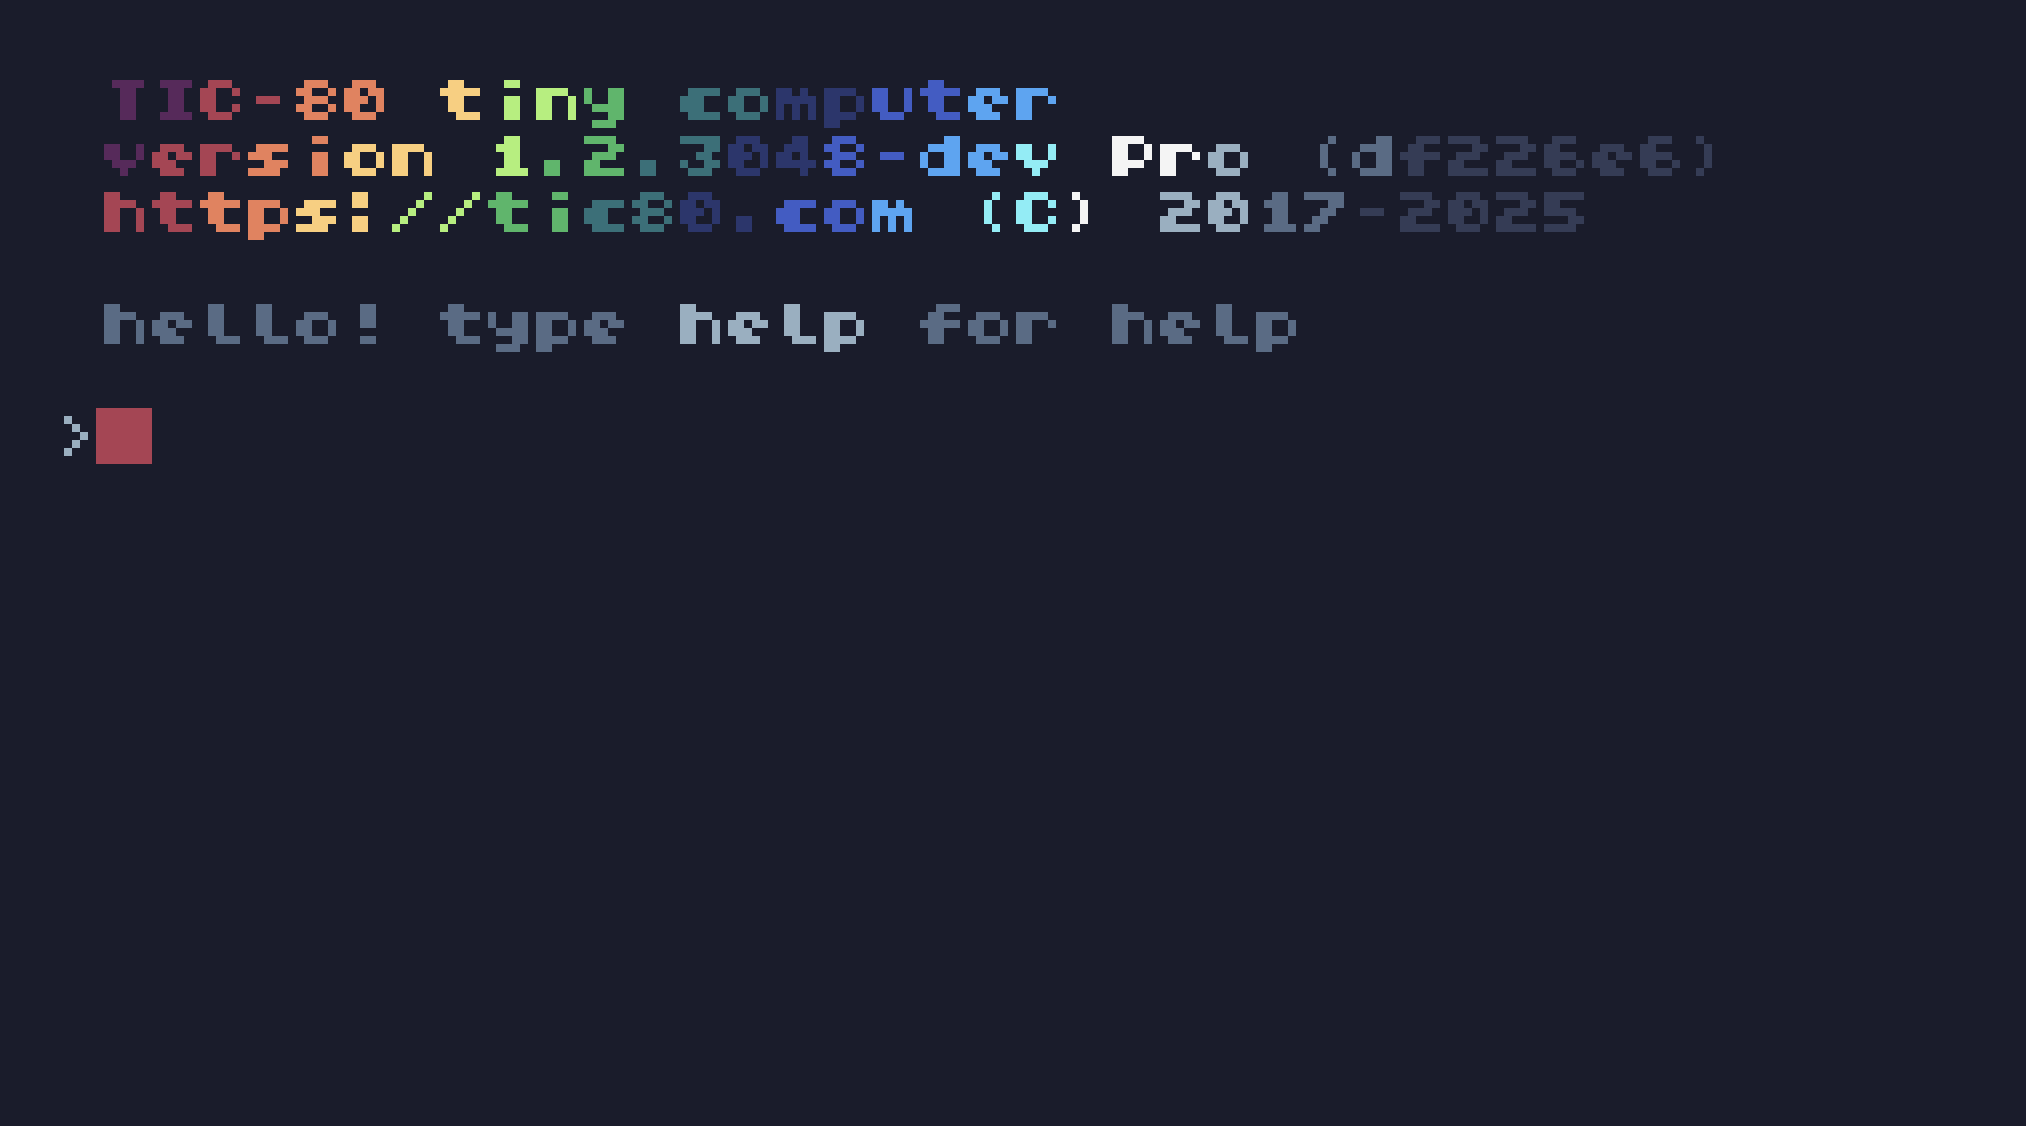
By default, TIC-80 starts you in a console-like environment. It’s a fantasy computer, after all.
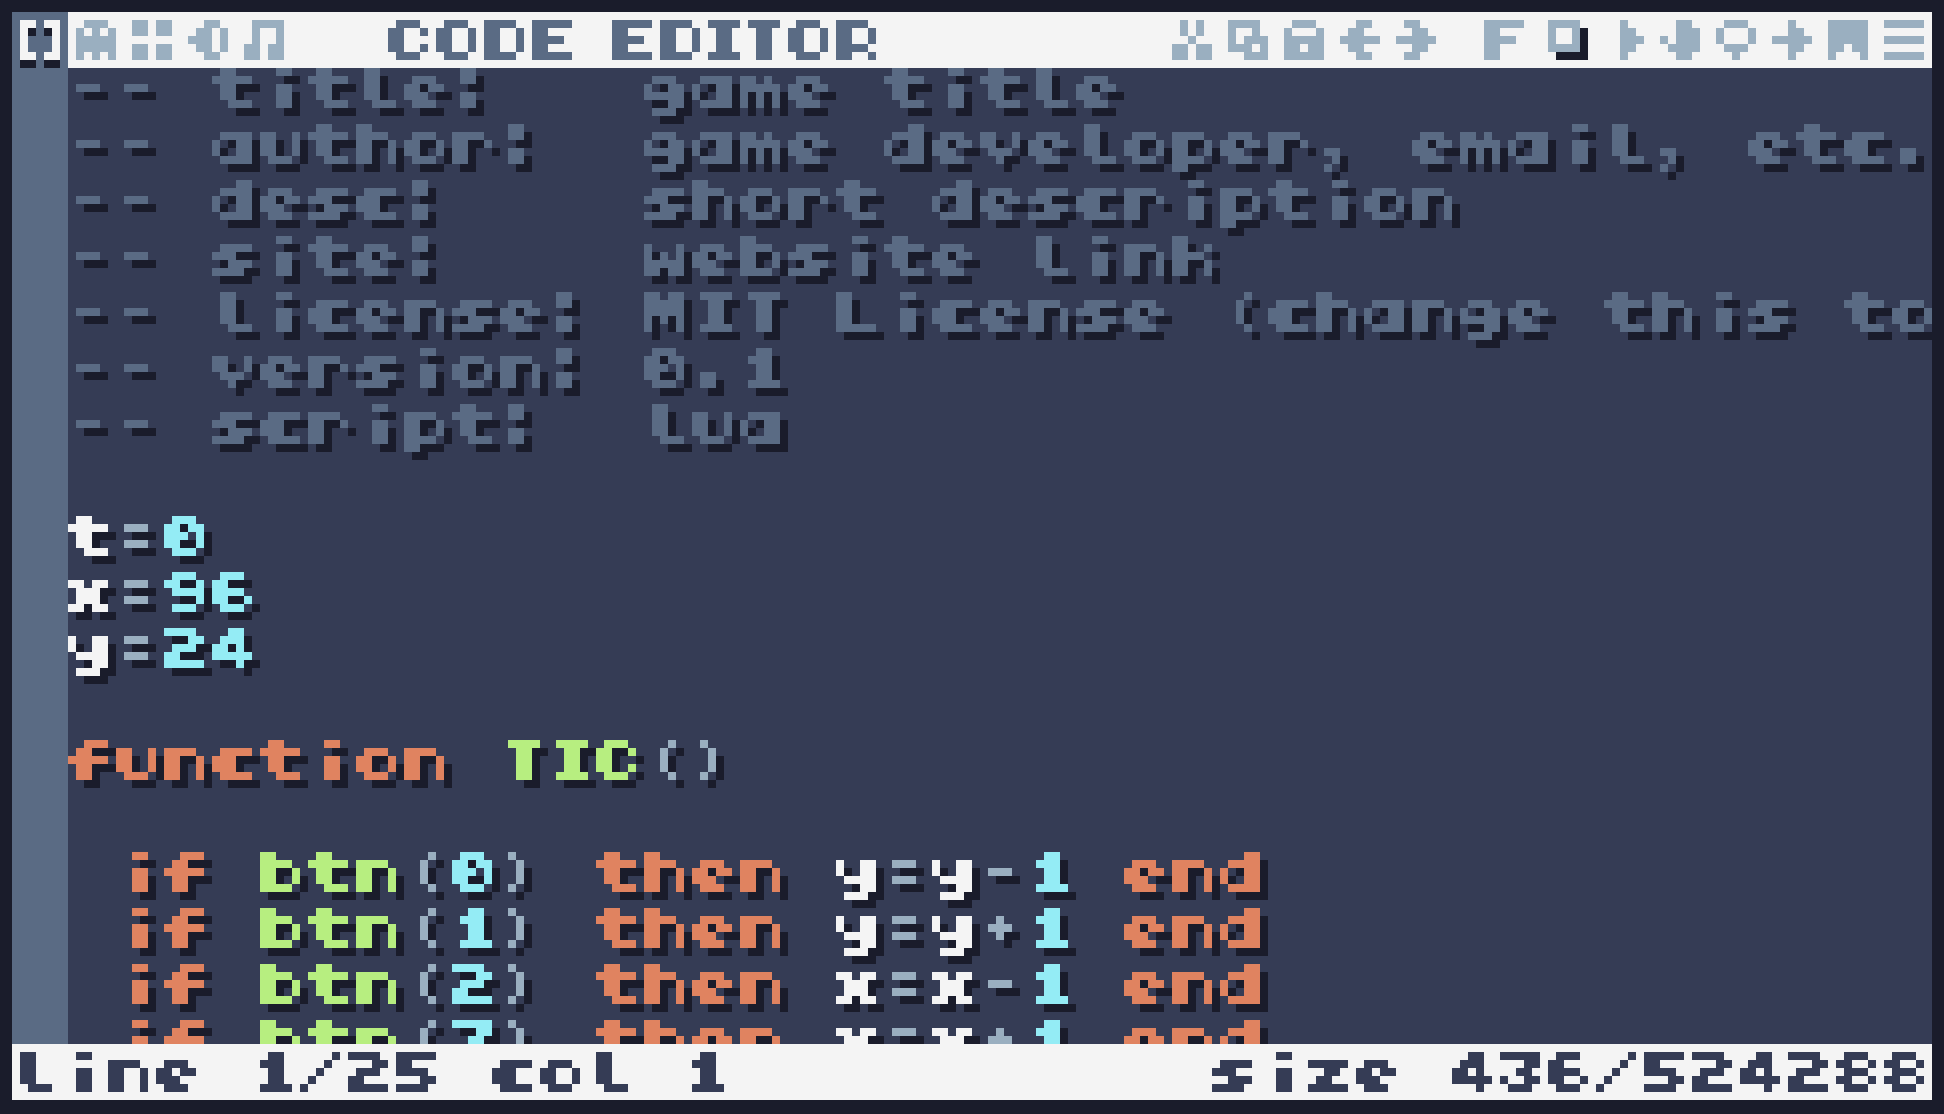
By pressing Esc, you can go into the code editor:
You can also switch to a built-in sprite editor by pressing F2 or clicking on a ghost icon in the top bar:
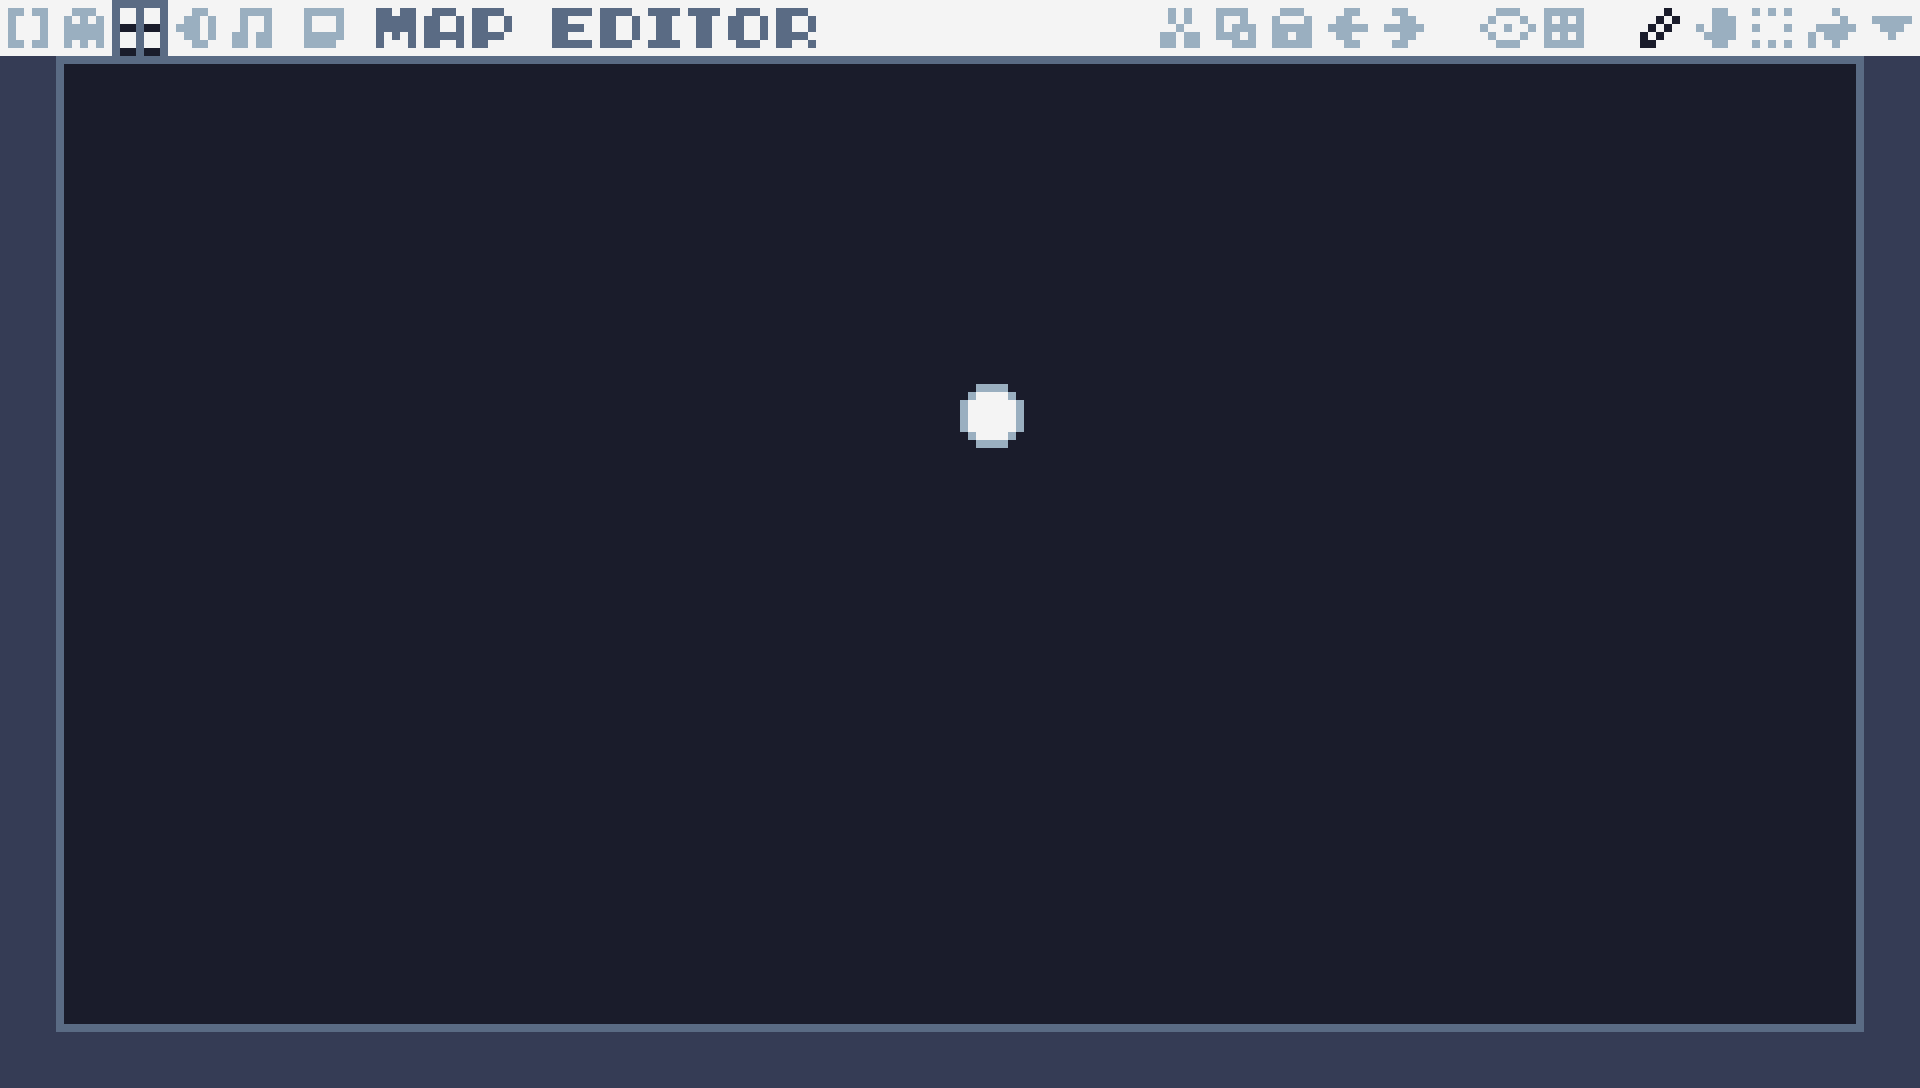
There’s also a map editor, which we’ll look into a bit later, you can create sound effects with a built-in synthesizer and write music in the tracker! It’s a fully self-contained system that you can develop your games in, and not just games - people write music in it, create beautiful entries for Demo Scene contests, and more.
I won’t be using the inbuilt code editor, though, as I’m much more comfortable writing in Emacs, and you can use any external editor with TIC, but we’ll be using the sprite and map editors. So, let’s start!
Creating a project and adding bump.lua
Actually, if you did start the TIC-80 with me, you don’t have to create anything - by default, TIC creates a sample cart that you can edit right away. That’s what we’ll do. First, let’s edit the metadata at the top of the cart:
-- title:   AABB Slopes
-- author:  Andrey Listopadov
-- desc:    Making slopes wiht AABB collisions
-- site:    https://andreyor.st
-- license: MIT License
-- version: 0.1
-- script:  lua
We could also delete default sprites right now, but we’ll do it later.
Right now, we need to add bump.lua to the cart.
TIC-80 doesn’t really provide access to your filesystem - it is expected for the cart to contain everything, much like game cartridges did in the early days of home consoles.
Because of that, it’s not possible to install bump.lua via LuaRocks, or download it and place the file near your cart.
We’ll have to embed it directly.
Luckily for us, it’s really easy to do so in Lua!
All we need is to set package.preload.bump to a function that contains all of the library code.
And even greater, that bump.lua is a simple, single-file, self-contained Lua library.
So we can do it like so:
package.preload.bump = function()
    -- Copy the bump.lua file contens here.
    -- Yes, as is.
end
Now, we can use require to bring this library to our game, and create the world:
local bump = require "bump"

local world = bump.newWorld(24)
Great! Now let’s draw some sprites we’ll use!
Creating sprites and using the map editor
There’s nothing much to talk about here, as TIC features a rather simplistic sprite editor:
However, we’ll be using some of its advanced features, which can be revealed by pressing this switch in the top left corner of the editor:
Figure 2: Advanced mode switch (red arrow), flags (green arrow)
One of such features is the flags we can set on a sprite. These flags act as a bit mask, so you can set up to 256 combinations of flags, which is enough, since TIC has space for exactly 256 sprites. Did I mention how cool the design of TIC is yet?
I’ve set bit 1 here to indicate that this sprite is a ball, and I set bit 0 for all of the solid objects drawn near it.
This way, when we load these sprites to the game world, we’ve created with bump.lua, we will be able determine what this object should be.
Now, let’s use these sprites in the map editor:
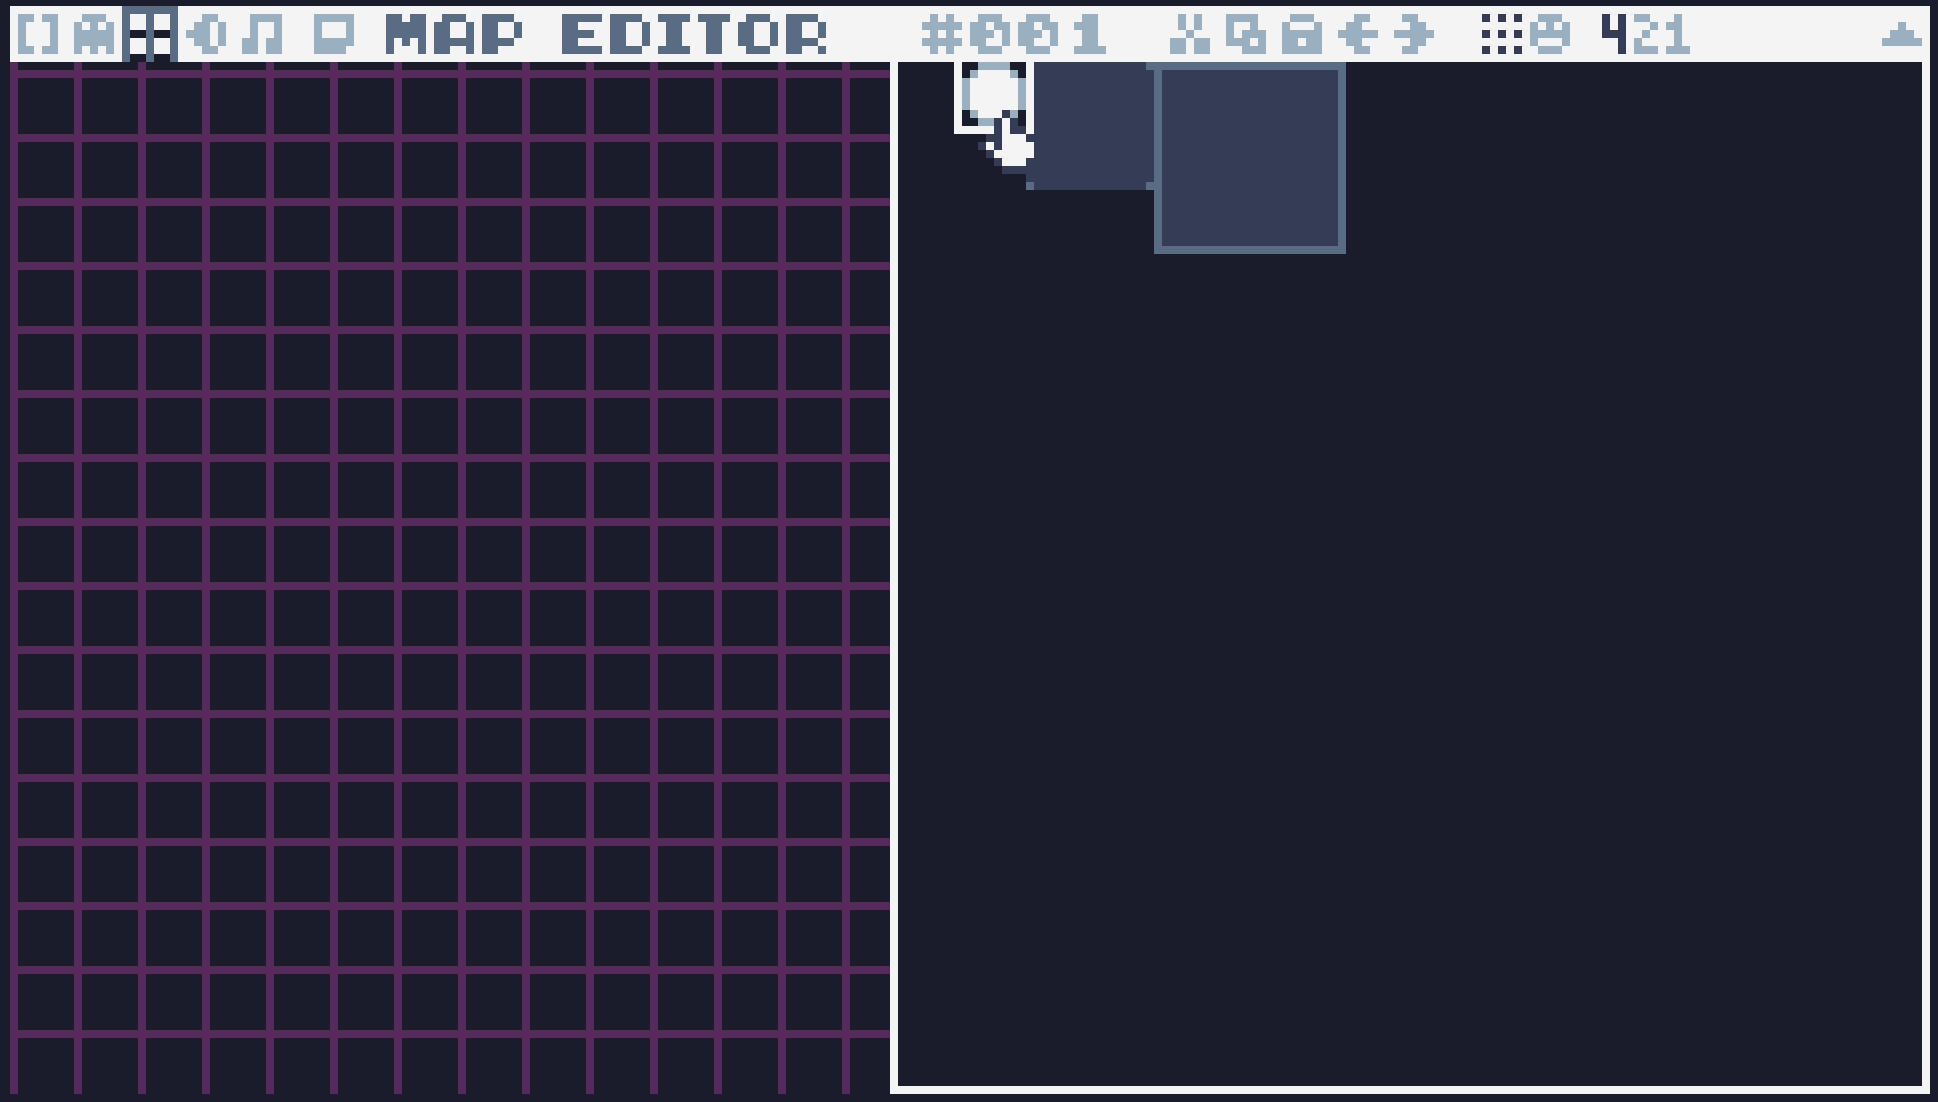
In the map editor, you can choose from either 256 tiles or 256 sprites to draw your map with. TIC actually has two sprite-sets: tiles and sprites. The only distinction between them is that you’re limited to either of those sets when you design your map. Other than that, they’re the same.
I’ve created a small test scene, with our ball and some walls:
Now we can start implementing our game logic, as right now if we run this cart, nothing would happen yet.
Loading entities to the world
We’ll start by editing the TIC function in our standard cart:
function TIC()
    cls(0)
    map(0, 0, 31, 18, 0, 0, 0, 1)
end
Now, if we run our cart, we’ll see the same thing we’ve seen in the map editor:
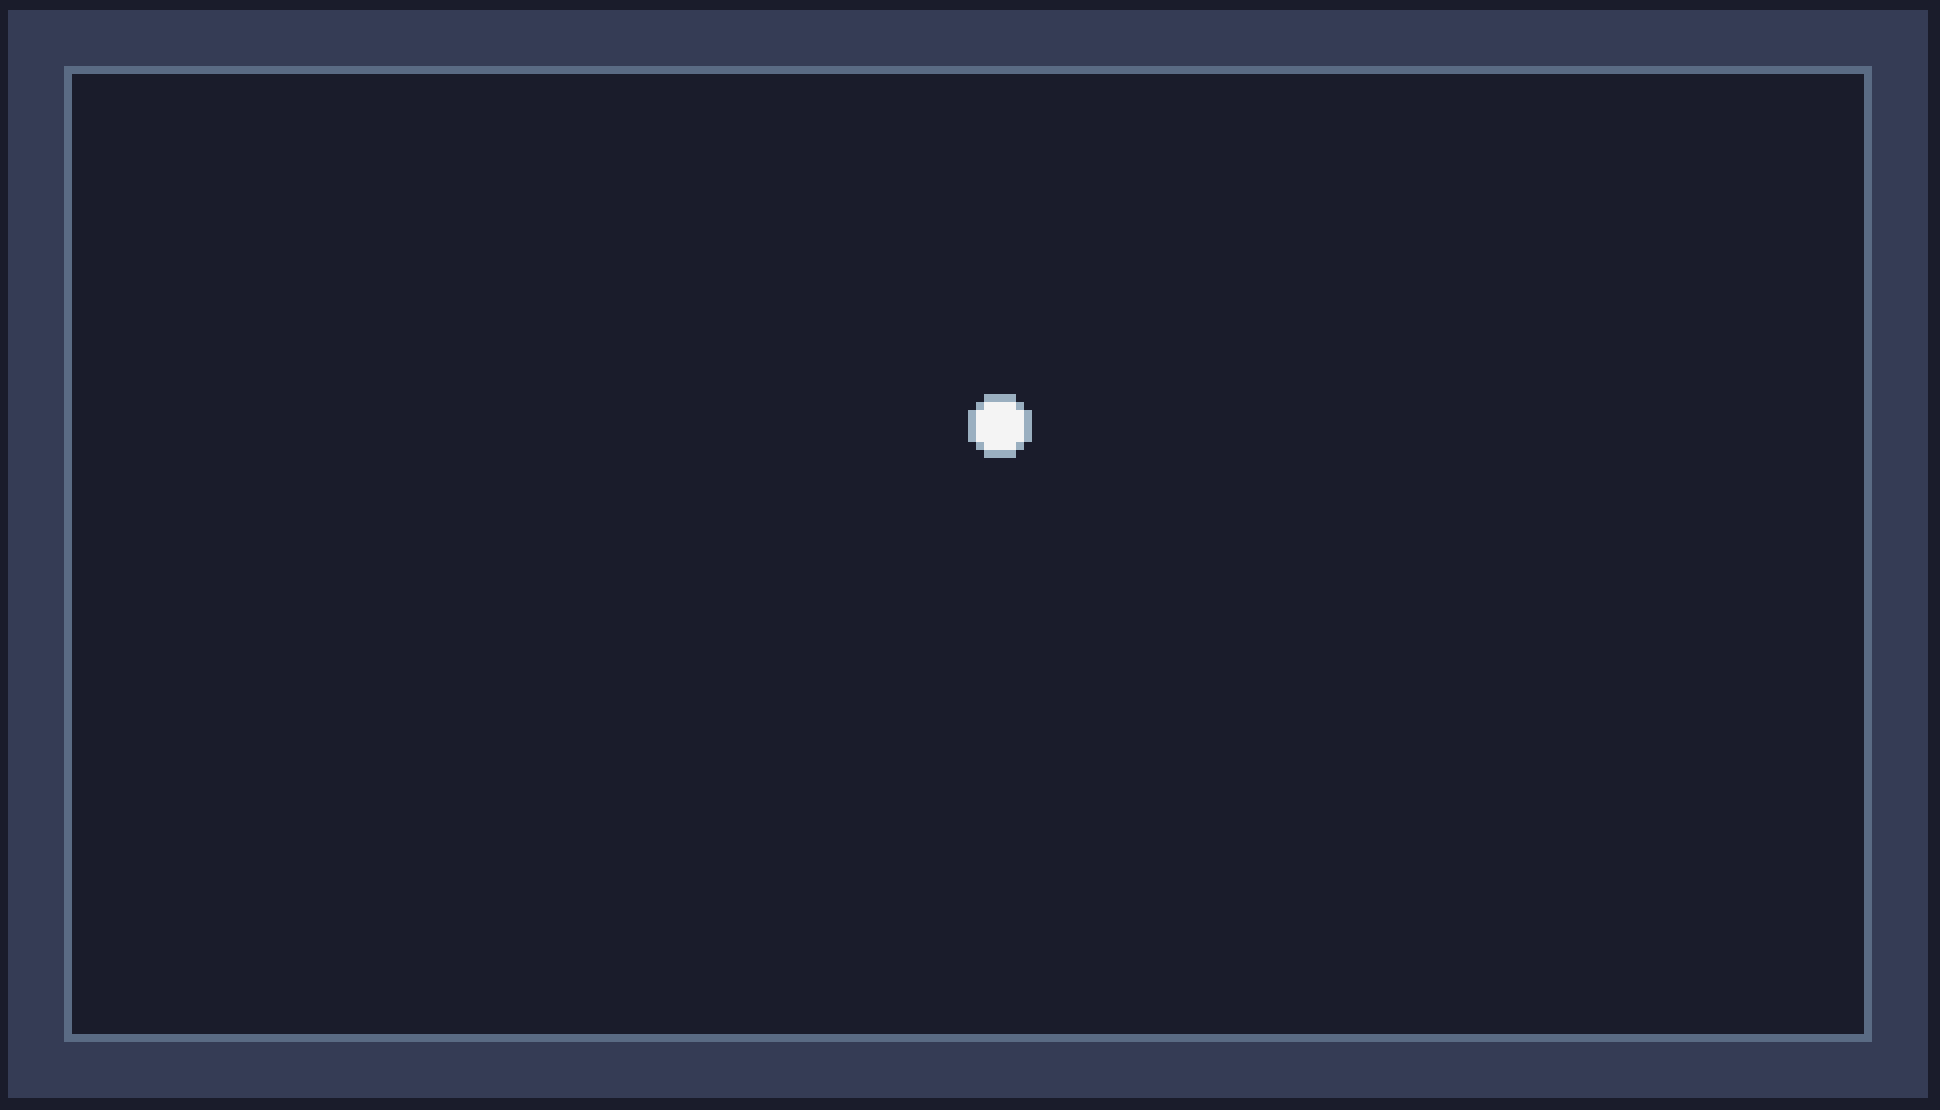
However, nothing moves yet, as we haven’t implemented any of the game’s logic. Before we can do that, we’ll need to populate our world with rectangles, so let’s do that.
local function load_map()
    for x=0, 240 * 8, 8 do
        for y=0, 136 * 8, 8 do
            local obj = is_obj(x, y)
            if obj then
                world:add(obj, obj.x, obj.y, obj.w, obj.h)
end end end end
Here, I’m loading the entire map to the world.
It’s not necessary to do that, since we’re only going to use one map screen, but it doesn’t hurt.
The key function here is the is_obj predicate, which we’re going to write next:
local balls = {}

local function is_obj(x, y)
    local id = id_at(x, y)
    if is_solid(id) then
        return {x = x, y = y, h = 8, w = 8}
    elseif is_ball(id) then
        local ball = {
            x = x,
            y = y,
            h = 8,
            w = 8,
            xvel = 0,
            yvel = 0,
            is_ball = true
        }
        balls[ball] = true
        return ball
end end
First things first, we need to get the ID of the tile at coordinates x and y.
We do so by using TIC’s built-in function mget:
local function id_at(x, y)
    return mget(x // 8, y // 8)
end
Next, we’ll define a set of predicates that, given an id will tell if the object we’re inspecting is a wall, or a ball:
local function is_solid(id)
    return fget(id, 0)
end

local function is_ball(id)
    return fget(id, 1)
end
So the is_obj function we’ve defined above gets the tile id, and checks if it is a ball, or a wall tile.
If so, it creates an object that we can add to the bump.lua world.
Each object has a set amount of required properties, but you can also have additional ones, like the is_ball field, in the case of the ball object.
We also add a ball to the list of balls, in case we might want to add more than one ball later.
Now, we can load the map.
We do so in the BOOT function, which executes when the cart is being loaded.
You can also write the call at the top level if you want, and it may make the code a little bit more portable, as older versions of TIC didn’t have BOOT, but I’m not targeting those, so:
function BOOT()
    load_map()
end
With that in place, we can implement some simple physics for the ball.
Working with bump.lua
Since we’ve loaded everything into the world we’ve created with bump.lua, we can now manipulate things in it.
We’ll be mainly manipulating balls, so let’s add some methods to the balls table:
setmetatable(
    balls,
    {
        __index = {
            update = function(self)
                for ball in pairs(self) do
                    ball.yvel = lerp(ball.yvel, 5, 0.1)
                    ball.xvel = lerp(ball.xvel, 0, 0.1)
                    ball.x, ball.y, cols, len = world:move(ball, ball.x + ball.xvel, ball.y + ball.yvel)
                    for i = 1, len do
                        local col = cols[i]
                        if col.normal.y == -1 then
                            ball.yvel = -(ball.yvel * 0.9)
                        end
                        if col.normal.x ~= 0 then
                            ball.xvel = -(ball.xvel * 0.9)
            end end end end,
            draw = function(self)
                for ball in pairs(self) do
                    spr(1, ball.x, ball.y, 0)
            end end
        }
    }
)
I’ve added two methods: draw and update.
It’s not necessary to separate these, you could do everything in one call, but it’s a bit easier to reason about them this way.
Yeah, I know, looping over all of the balls two times just to update each, and then draw each is bad design, since we could do it in one loop, but that’s not the main focus here.
But it’s great that you’ve pointed this out!
Ten points to the TIC house!
Anyway, we’re looping over all of the balls in the table, which we don’t have that many yet, only one, and updating each one.
The important part here is that we compute the ball’s X and Y velocity, and then use them to move the ball in the world, by calling world:move().
I’m using linear interpolation, defined as follows:
local function lerp(a, b, t)
    return ((1 - t) * a) + (t * b)
end
We don’t care that much about delta-time here, as TIC runs at a consistent 60 frames per second even when you push it to the limits. You can, of course, slow it down with bad code, and we already have two loops instead of one, which is concerning, but we’ll be fine, don’t worry. Lua is quite fast.
ball.x, ball.y, cols, len = world:move(ball, ball.x + ball.xvel, ball.y + ball.yvel)
So by calling world:move() with the ball object, we receive new X and Y positions of that ball after it was moved with respect to collisions.
We’re not going to build a sophisticated physics engine here, but we will need to handle some collisions.
bump.lua actually has different collision types, like bounce, that we could use here, but for our purposes the default slide is better.
In addition to the new X and Y positions, this function returns a list of collisions that happened during the move. We can loop over those and update our ball’s properties, such as its velocity. We do so in the following loop3:
for i = 1, len do
    local col = cols[i]
    if col.normal.y == -1 then
        ball.yvel = -(ball.yvel * 0.9)
    end
    if col.normal.x ~= 0 then
        ball.xvel = -(ball.xvel * 0.9)
end end
We’re slowly decreasing the ball’s velocity, also switching directions on contact.
That’s pretty much what the bounce collision would do for us.
For the draw method, we simply draw the ball sprite using another TIC’s builtin function spr.
Having these implemented, we can add them to the TIC function, like so:
function TIC()
    cls(0)
    map(0, 0, 31, 18, 0, 0, 0, 1)
    balls:update()
    balls:draw()
end
Now, if we run our game, we’ll see our ball bouncing:
Uh oh, why are there two balls, and one floating over the ground?
Did we forget to add it to the balls table, so it gets updated?
If we did, why is it even drawn - we loop over balls in both functions.
If you look closer, you’ll see the problem.
We’ve loaded the map to the world, and we’re drawing the ball using the spr function.
But we’re still drawing the original map in the TIC function by calling map!
And our map still has the ball.
We can go two ways here.
One would be to use the mset function and replace the ball tile with nothing in our map when we’re loading it.
Or, we can hide the ball at runtime using map function’s special remapping feature.
Let’s do that instead, as it is a bit cleaner:
local function remap(id)
    if is_ball(id) then
        return 0
    end
    return id
end
Now, we update our TIC function to use this remap function in our map call:
function TIC()
    cls(0)
    map(0, 0, 31, 18, 0, 0, 0, 1, remap)
    balls:update()
    balls:draw()
end
And, presto!
Handling mouse events
Our introduction to TIC isn’t over yet, because I always wanted to try using the mouse integration. Our ball is currently pretty stiff, so we’ll tweak its physics along the way. Having mouse support will make it easier to test things out, as doing so by updating the code is a bit cumbersome. And I don’t know how to make sensible controls for a ball with arrow keys - it’s just a bouncing ball, what do you expect it to do, roll by itself when you press a magic key?? Let’s drag the balls instead.
We’ll start by creating a small storage variable that we’ll assign to the currently grabbed ball:
local grabbed = nil
It’s uninitialized by default, we’ll set it later in the update method:
local mx, my, is_pressed = mouse()
if is_pressed and not grabbed then
    local items = world:queryPoint(mx, my, function(obj) return obj.is_ball end)
    if next(items) then
        grabbed = items[1]
    end
elseif not is_pressed then
    if grabbed then
        grabbed.xvel = (grabbed.x - grabbed.prev_x)
        grabbed.yvel = (grabbed.y - grabbed.prev_y)
        grabbed.prev_x, grabbed.prev_y = nil, nil
    end
    grabbed = nil
end
We add this before the main loop over all balls in the update function.
The mouse function in TIC returns a set of values, X and Y coordinates, and states of each mouse button.
We’re only interested in the left mouse button, so that’s what we store.
Then, if the button is pressed, we use a method from the Intermediate API section of bump.lua.
It returns a list of items, and since we don’t have anything that overlaps, we can safely take the first item in the list.
We’re also using a similar feature to the map function’s remap here - we’re providing a filtering function that will make sure that we can only grab ball objects, not other tiles.
When the button is released, its state will change, and we need to release the ball.
If there was a ball grabbed, we set its velocity to conserve the momentum from moving it by the mouse, which we’ll handle later.
Then we unset the grabbed storage variable.
Next, in the for loop responsible for updating the balls, we check if the current ball is the one we’ve grabbed, and we override its movement:
for ball in pairs(self) do
    if ball == grabbed then
        local x, y = lerp(grabbed.x, mx-4, 0.3), lerp(grabbed.y, my-4, 0.3)
        grabbed.prev_x, grabbed.prev_y = grabbed.x, grabbed.y
        ball.x, ball.y = world:move(ball, x, y)
    else
        -- no changes to the old logic
end end
So, as you can see, we’re moving the ball to the mouse pointer coordinates, still with respect to collisions.
We also store additional information in the grabbed object, mainly the previous X and Y positions that we use in that momentum conservation code a bit earlier.
And with that, we can drag the ball around:
This is as basic as it gets - you’ll notice that if we add more balls, we can’t move other balls with the one we’re dragging. You can, of course, make a more sophisticated physics simulation - handle collisions better, so it would move other balls as well, transfer the momentum to other objects, make balls roll off each other, as right now they’re basically squares, and so on.
So you can do something like that if you try experimenting with collision resolution a bit more:
Now, we’re pretty much set for working towards the main topic of this post - slopes.
Implementing slopes with AABB collisions
Phew, FINALLY, all that just to tell you that to handle slopes you just need to do…
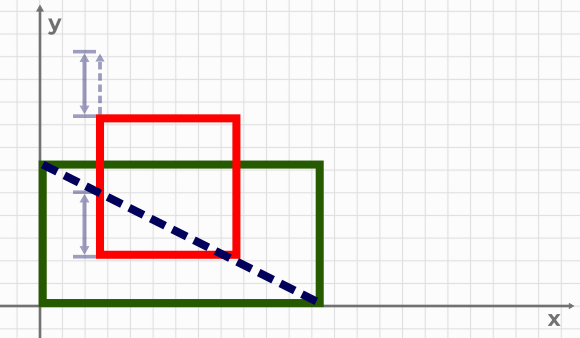
Figure 3: …is this.
OK, this is anticlimactic, so let’s implement this. But first, what is a slope in our case?
Because we can only have axis-aligned rectangles, we need to create a special kind of object in our world that will still be a rectangle, but handle collisions differently.
Since our game is tile-based, we don’t have a lot of meaningful angles to support.
The most common slope in games is a segment with dimensions of 16x8.
It spans exactly two tiles and takes you one tile height up.
Let’s draw it:
You can see that I’ve set bit 2 to the slope tile here, so we can correctly handle it while loading our map to the world. If we add these to the world right now, they won’t work, obviously, since these are regular rectangles:
So let’s change that:
local function is_up_slope(id)
    return fget(id, 2)
end

local function is_down_slope(id)
    return fget(id, 3)
end
We’ll start by defining two more predicates, and then use them in our is_obj function:
local function is_obj(x, y)
    local id = id_at(x, y)
    if is_solid(id) then
        return {x = x, y = y, h = 8, w = 8}
    elseif is_up_slope(id) then
        return {x = x, y = y, h = 8, w = 16, slope = slope, dir = 1}
    elseif is_down_slope(id) then
        return {x = x, y = y, h = 8, w = 16, slope = slope, dir = -1}
    elseif is_ball(id) then
        local ball = {
            x = x,
            y = y,
            h = 8,
            w = 8,
            xvel = 0,
            yvel = 0,
            is_ball = true
        }
        balls[ball] = true
        return ball
end end
As you can see, these are regular rectangles, except in our world, the 8x8 tile creates a 16x8 rectangle.
The other half of the slope is just decoration.
We also have the slope and dir fields here.
The slope is a function responsible for handling collisions that we’ll implement shortly.
The dir field determines if this is an up-slope, raising from left to right, or a down-slope, lowering from left to right (or raising from right to left).
We need to know the direction, otherwise, we won’t be able to calculate normals and properly map coordinates to new values.
Calculating slope collision coordinates
Here’s the slope function:
local function slope(obj)
    if obj.yvel >= 0 then
        local _, _, cols, len = world:check(obj, obj.x, obj.y + obj.yvel, slope_filter)
        for i=1, len do
            local col = cols[i]
            if col.normal.y ~= 1 then -- -1 or 0 will do
                local slope_floor = col.other.y - col.other.h
                local delta = clamp(0, (obj.x + obj.w / 2) - col.other.x, col.other.w) / col.other.w
                local y_off = nil
                if col.other.dir > 0 then
                    y_off = lerp(col.other.h, 0, delta)
                else
                    y_off = lerp(0, col.other.h, delta)
                end
                local newy = slope_floor + y_off
                return math.floor(newy), slope_normal(col.other)
end end end end
Now, that’s a lot to take in. Let’s go through step by step.
First, we check if the object’s velocity is going at least downwards. We don’t want to trigger slope collisions when objects move away from the slope, so that’s pretty simple.
Next, as usual, we need to handle collisions.
However, there’s a catch - since our slopes are rectangles in disguise, we can’t just use the normal world:move() and be done.
Instead, we need to kinda implement the world:move() in terms of world:check() and world:update().
The check method does the same stuff as move except it doesn’t move anything.
It pretends that the object has moved, and returns a list of collisions and coordinates where it would end up if it actually moved.
That’s perfect for our needs.
The update method can move the object around without checking for any collisions, and that’s the other piece of the puzzle.
But right now, the ball collides with the slope rectangle, and it can’t go further, what can we do? We use filtering, of course.
The world:check() also accepts the collision filter, as world:move() does.
We’ll need to add two new filter functions, one for checking slopes specifically, and the other to allow balls to move through slope rectangles freely:
local function slope_filter(_, other)
    if other.slope then
        return "cross"
end end

local function ball_filter(_, other)
    if other.slope then
        return "cross"
    else
        return "slide"
end end
With that out of the way, we can go into collision checking.
As usual, we iterate over a list of collisions. We then check if the collision’s Y component of the normal vector points at least up. If so, we have our collision, but we are just getting started.
Next, we calculate the slope floor Y position. This is the lowest coordinate our collision could possibly have:
local slope_floor = col.other.y - col.other.h
Next, we calculate the delta:
local delta = clamp(0, (obj.x + obj.w / 2) - col.other.x, col.other.w) / col.other.w
This is how far from the left edge of the slope rectangle the collision is going to happen.
We try to measure in the center of the colliding tile, and normalize it to be a value from 0 to 1.
Next, we need to determine the Y coordinate on that slope:
local y_off = nil
if col.other.dir > 0 then
    y_off = lerp(col.other.h, 0, delta)
else
    y_off = lerp(0, col.other.h, delta)
end
We do so by checking the slope direction, and do a linear interpolation between 0 and slope height, using our delta value.
Linear interpolation will move us in a straight diagonal line from the bottom corner of the slope to the top corner of the slope.
Direction is simply used to flip the interpolation.
Finally, we’re calculating a ney Y position, and normals to return:
local newy = slope_floor + y_off
return math.floor(newy), slope_normal(col.other)
Our Y position from lerp is relative to the slope, so we add back the slope_floor position to translate it back to world coordinates.
And that’s pretty much just a small part of it! Wait…
Handling slope collisions
We still need to adjust the object’s position to that coordinate - why didn’t we do so in the slope function itself? Well, because reasons…
I mean, I tried to do that, but it didn’t work well, there are many outside factors that we may need to consider, and it’s not the best way to move it to this function.
So let’s change our update method of the balls table.
First, let’s handle normal ball collisions. Mouse collisions will come later:
for ball in pairs(self) do
    if ball == grabbed then
        --- 8< ---
    else
        ball.yvel = lerp(ball.yvel, 5, 0.075)
        ball.xvel = lerp(ball.xvel, 0, 0.03)
        ball.x, ball.y, cols, len = world:move(ball, ball.x + ball.xvel, ball.y + ball.yvel, ball_filter)
        for i = 1, len do
            local col = cols[i]
            if col.other.slope then
                local newy, xnorm, ynorm = col.other.slope(ball)
                if newy and ball.y >= newy then
                    world:update(ball, ball.x, newy, ball.w, ball.h)
                    ball.y = newy
                    ball.xvel = ball.xvel + xnorm
                    ball.yvel = (- ball.yvel - ynorm) * 0.5
                    break
                end
            else
                if col.normal.y ~= 0 then
                    ball.yvel = -(ball.yvel * 0.9)
                    ball.xvel = ball.xvel * 0.75
                end
                if col.normal.x ~= 0 then
                    ball.xvel = -(ball.xvel * 0.9)
end end end end end
end keywords on the same line? This post would be even longer! It's already a bit too long…
Main differences from before: we added ball_filter to the world:move() call, and split collision handling logic into two separate branches.
The first branch checks if the collision happens with a slope and handles it.
The second branch is the same as before.
The collision handling is pretty simple, really - we check if slope actually returned a new coordinate, and if the ball’s current Y position is lower than that, we need to handle the collision.
The ball_filter sets slope collisions to cross, and it allows balls to move through slope blocks as if they’re not there, except we still get collision information.
So if the ball’s Y coordinate is less than the slope collision coordinate, it means that we need to push the ball out of the slope.
We do it straight up, without concerns about the normal vector to the slope, but it is possible to do so (I’m just lazy).
Calling world:update() sets the ball to a new position, and we also update its fields to set the new coordinate, and update velocities.
We also break from this loop, as we don’t really want to handle any other collision, since it could get messy.
Now, let’s do the same for mouse movement:
for ball in pairs(self) do
    if ball == grabbed then
        local x, y = lerp(ball.x, mx-4, 0.3), lerp(ball.y, my-4, 0.3)
        ball.prev_x, ball.prev_y = ball.x, ball.y
        ball.x, ball.y, cols, len = world:move(ball, x, y, ball_filter)
        for i = 1, len do
            local col = cols[i]
            if col.other.slope then
                local yvel = ball.yvel
                ball.yvel = 1 -- needed for the slope check to happen
                local newy = col.other.slope(ball)
                ball.yvel = yvel -- restore the original velocity
                if newy and ball.y >= newy then
                    world:update(ball, ball.x, newy, ball.w, ball.h)
                    ball.y = newy
        end end end
    else
        --- 8< ---
end end
It’s pretty similar to the one above, except we need to do a small trick.
Notice how we set the ball’s velocity to 1 right before the check?
Since the ball is moved by the mouse, its velocity is not really updated.
Don’t ask me how long I was debugging why the collision doesn’t happen…
And that’s pretty much it!
We can also add a different kind of slope to show that this approach is generic enough:
Conclusion
This is still, by no means, a proper physics simulation of slopes. Balls bounce off slopes in the wrong direction at certain angles, normals are ignored when handling collisions, but hey, this might not be a problem in your game at all!
For instance, in my original case, the player is the main object I need to be able to interact with slopes, and I have a pretty simplistic game-oriented physics. So I don’t need the player to jump in a weird way when it’s on a slope - jumps should remain predictable. There are no projectiles that bounce off walls either, and thus, this implementation works fine.
You can, of course, use these principles to implement a more sophisticated engine. And there’s still a lot of room for improvement, too.
For instance, the way we define slopes is quite limited. Sure, we can adjust the slope angle, but because we’re building large slopes from small building blocks, there’s a wonky collision at these blocks’ corners. Instead, we could define two points and programmatically generate map tiles along the slope angle up to its end, using predefined sprites. And for non-sprite-based games, it doesn’t make sense to limit slopes to certain angles - you can define arbitrary-sized rectangles, making slopes as steep as needed.
Alternatively, you can refactor this code and define slopes as mathematical functions. Thus, you’ll be able to create splines and have curved slopes. Normal vector calculation will be a bit tougher, though.
And actually, if you happen to know some blog posts on the matter, please send them! I’m quite interested.
If you want to experiment with the code, here’s a cart that you can load with TIC-80, or you can experiment online on TIC’s website:
Figure 4: That’s an actual game cartridge you can load into TIC-80!
That’s all from me. Hope you’ve enjoyed this write-up as much as I did, and see you next time!
-
Code responsible for controlling the player object - movement, abilities, general game logic ↩︎
-
Fennel is Lua, but it adds a few features on top, like macros that allow additional metaprogramming capabilities, and fixes a bunch of Lua’s shortcomings. ↩︎
-
This looks so much tighter in Fennel, gosh:
↩︎(each [_ col ipairs(cols)] (when (= col.normal.y -1) (set ball.yvel = (- (* ball.yvel 0.9)))) (when (not= col.normal.x 0) (set ball.xvel = (- (* ball.xvel 0.9)))))